Cold weather doesn’t have to shut down your favorite cooking spot. With a few smart choices, you can grill, roast, and gather outside even when there’s frost on the ground.

I’ve spent years testing setups in snowy northern climates, and the good news is this: a great cold-weather outdoor kitchen is more about planning than expensive gear.

In this guide, you’ll learn 20 practical outdoor kitchen ideas for cold weather that keep the heat in, protect your equipment, and make winter cooking genuinely enjoyable. Here’s what you’ll walk away with:
- Ways to add warmth and shelter without a full remodel
- Materials and appliances that survive freezing temps
- Small comfort upgrades that make you actually want to cook outside
Let’s dig in.
1. Build a Covered Roof or Pergola for Year-Round Protection
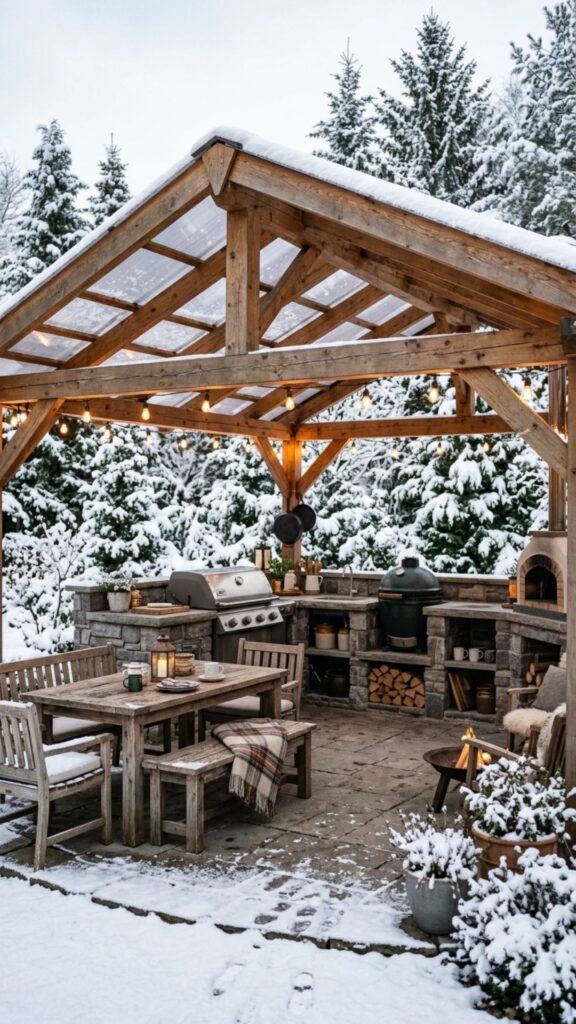
A solid roof is the single best upgrade for winter cooking. It blocks snow, rain, and ice from landing on your appliances and countertops, which means less maintenance and longer-lasting gear. A gabled roof sheds snow better than a flat one, so choose a pitched design if heavy snowfall is common in your area.
If a full roof feels like too much, a pergola with a retractable canopy is a flexible middle ground. You get shade in summer and coverage in winter. Pair it with clear polycarbonate panels to keep the space bright even under gray skies.
2. Add Overhead Radiant Heaters
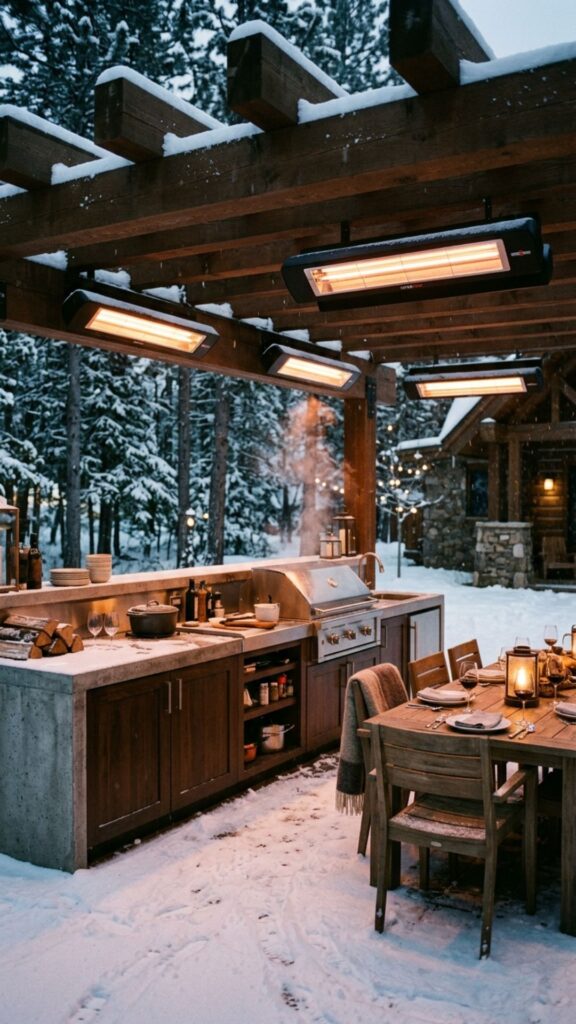
Overhead radiant heaters warm people and surfaces directly instead of trying to heat the open air. Mounted heaters save floor space and won’t tip over, which makes them ideal for compact patios. Electric infrared models are clean, quiet, and easy to control with a switch.
Position heaters over the prep and dining zones, not directly above the grill. One 1,500-watt unit typically covers a 10-by-10-foot area. For larger kitchens, plan for two or three so nobody ends up shivering at the edge.
3. Install a Freestanding Fire Pit or Fireplace
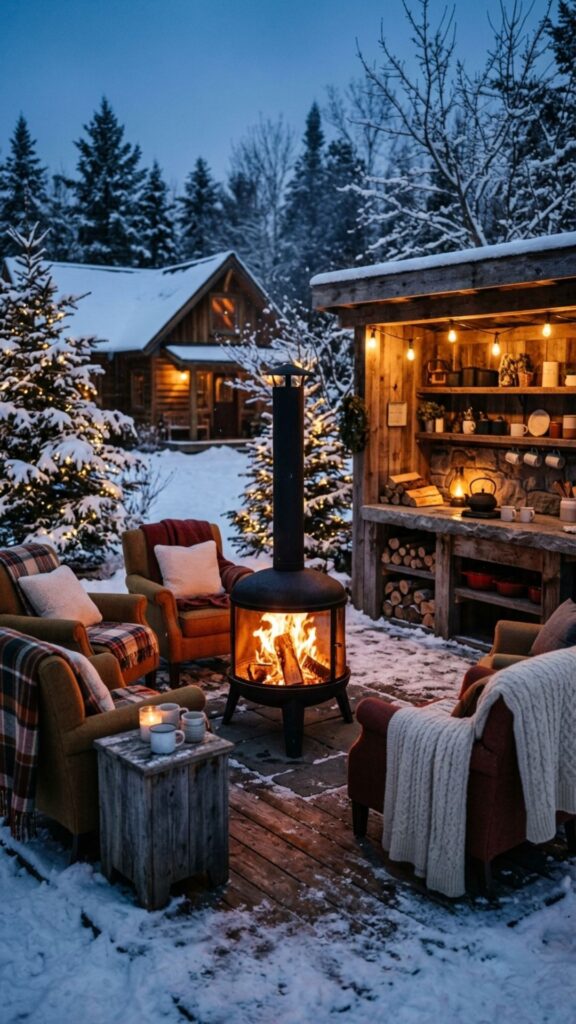
Nothing pulls a crowd together in winter like a fire. A built-in gas fireplace offers instant heat with the flip of a switch, while a wood-burning fire pit adds that classic crackle and smoky smell. Both extend how long guests linger outside when temperatures drop.
Keep at least three feet of clearance between the fire feature and any seating or combustible surfaces. Gas versions are more convenient for quick evenings, but a wood fire doubles as a cooking spot for skewers and cast-iron dishes.
4. Choose Weatherproof Stainless Steel Appliances
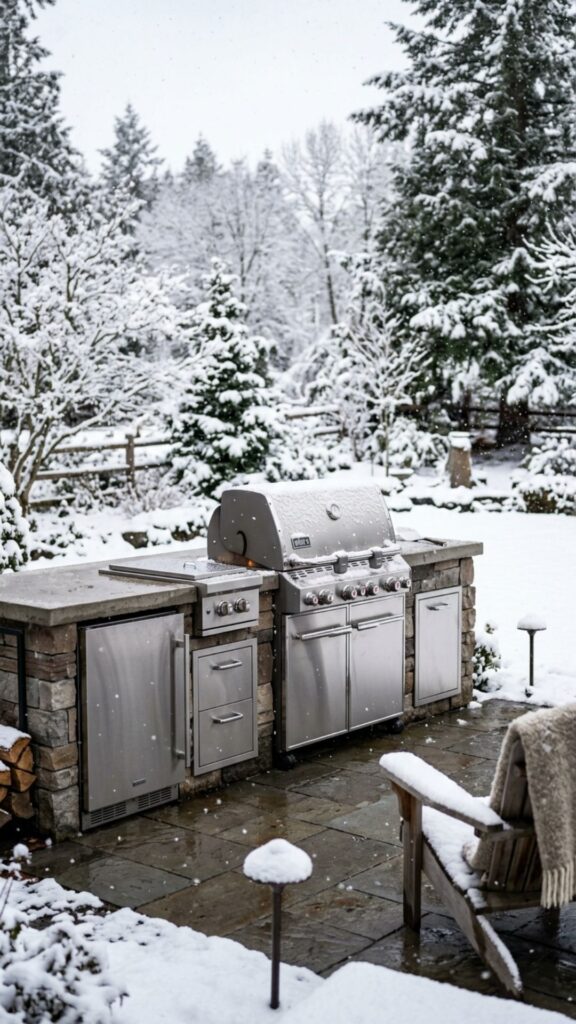
Not all stainless steel is equal. Look for marine-grade 316 stainless, which resists rust from snow, salt, and moisture far better than standard 304. This matters most in coastal or heavily salted regions where corrosion sets in fast.
Buy appliances rated for outdoor use and check the warranty for cold-weather coverage. A quality grill, side burner, and refrigerator built for the elements will pay off through years of frozen mornings and slushy afternoons.
5. Add Wind Barriers and Privacy Screens
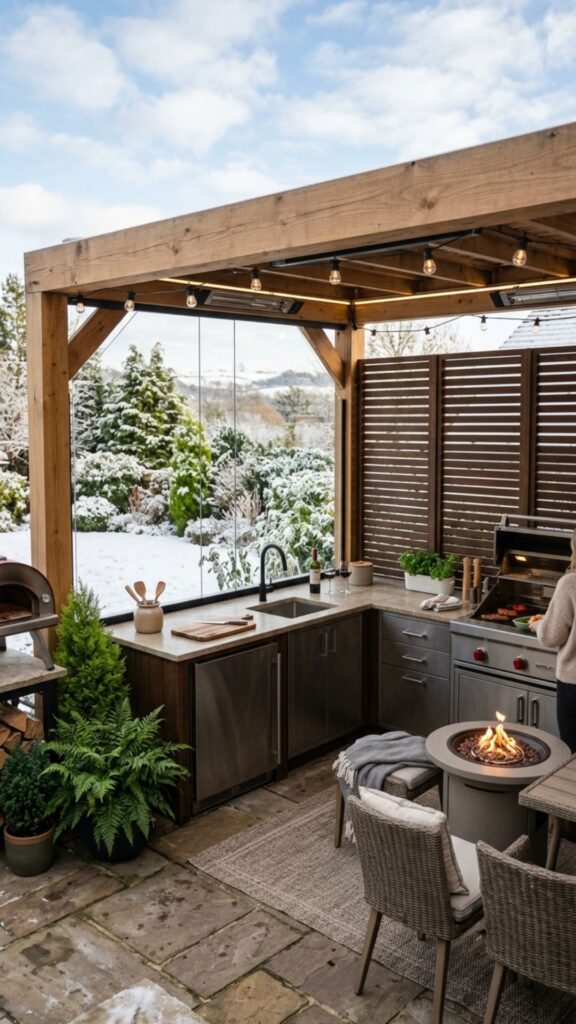
Wind steals heat faster than cold air alone. A well-placed screen blocks gusts, keeps your grill flame steady, and stops smoke from blowing into your face. Even a partial barrier makes a noticeable difference in comfort.
Use glass panels for an open feel, or slatted wood and metal for more privacy. Position screens on the side facing your prevailing winter winds, which you can figure out by watching where snow drifts pile up on your property.
6. Install Radiant Floor Heating
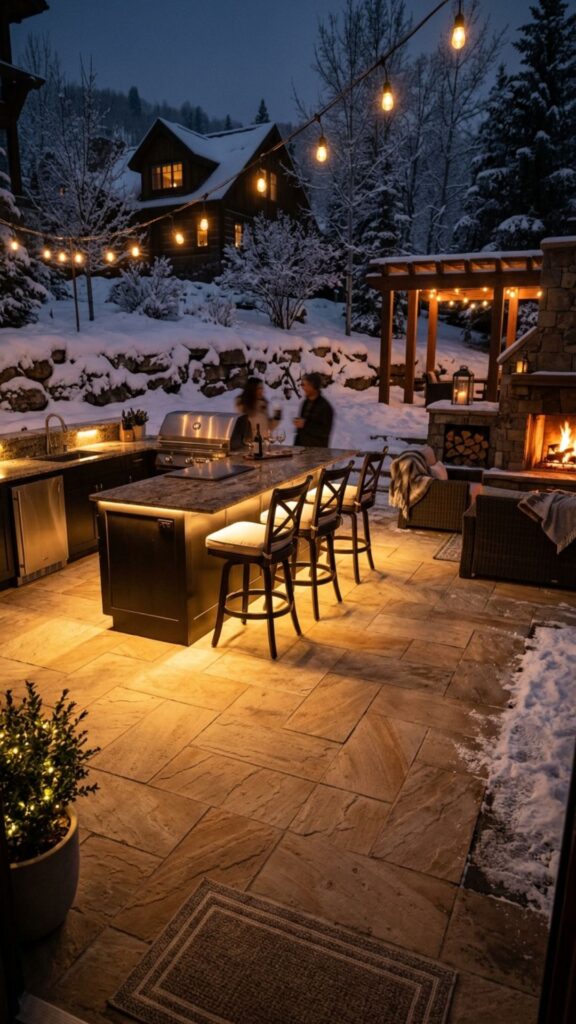
Cold feet ruin outdoor time faster than anything. Radiant floor heating runs warm water or electric coils beneath tile or concrete, keeping the ground comfortable and free of ice. It also helps melt light snow before it builds up.
This works best when planned during construction, but retrofit mats exist for existing patios. It’s a bigger investment, yet the payoff is a slip-safe, cozy surface that transforms winter cooking from a chore into a pleasure.
7. Use Insulated Cabinets and Storage
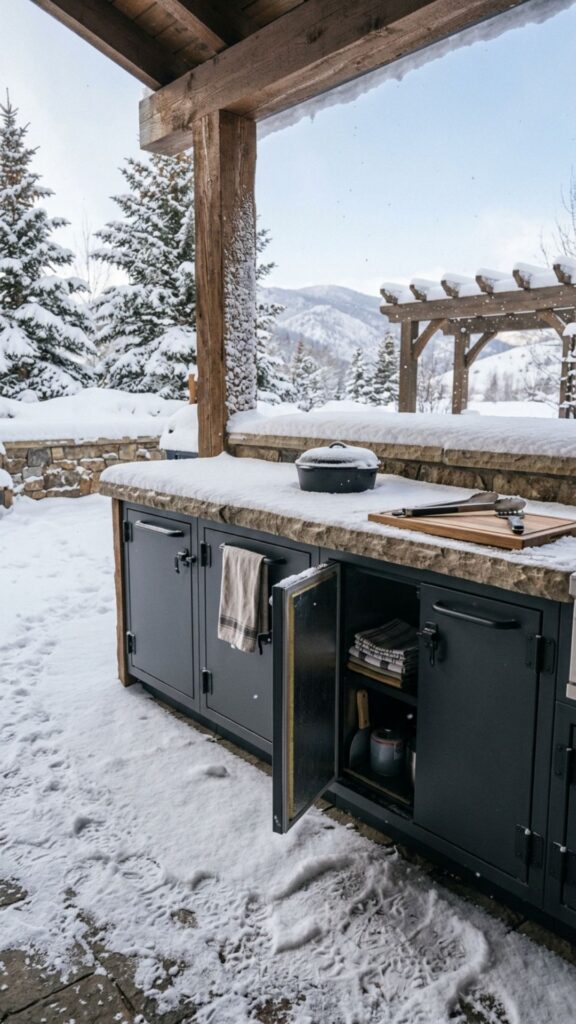
Insulated, sealed cabinets protect your tools, spices, and gadgets from moisture and freezing damage. Look for weather-tight doors with rubber gaskets that keep snowmelt and condensation out. Powder-coated aluminum handles the cold without cracking.
Store items you use often at waist height so you’re not bending into snowbanks. A dedicated dry cabinet for towels and matches means you always have what you need without running back inside.
8. Pick Freeze-Resistant Countertops
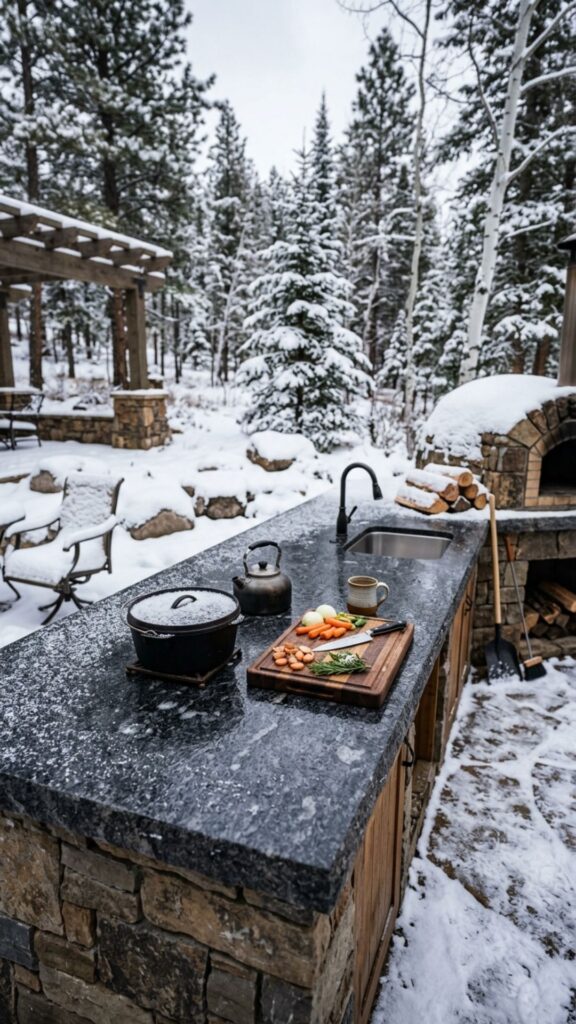
Some countertop materials crack when water seeps in and freezes. Granite, porcelain, and concrete sealed properly all handle freeze-thaw cycles well. Avoid unsealed natural stone, which absorbs water and can flake over time.
Choose darker colors that absorb sunlight and stay slightly warmer to the touch. Seal your counters at least once a year before winter hits to lock out moisture and keep the surface looking sharp.
9. Add a Pizza Oven for Extra Warmth and Flavor
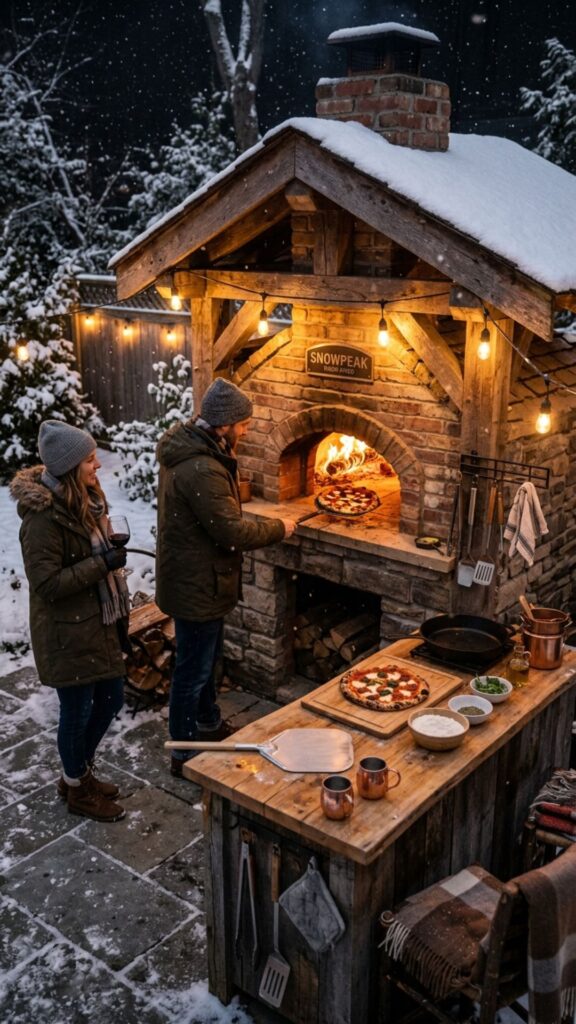
A wood-fired or gas pizza oven does double duty in winter. It throws off serious radiant heat while cooking, and the high temperatures make it perfect for pizza, roasted vegetables, and bread. Guests naturally gather around it for warmth.
Brick and refractory ovens hold heat for hours after the fire dies down. That stored warmth is a gift on frigid nights, letting you slow-roast a meal long after other appliances have cooled off.
10. Set Up Proper Drainage and Snow Management
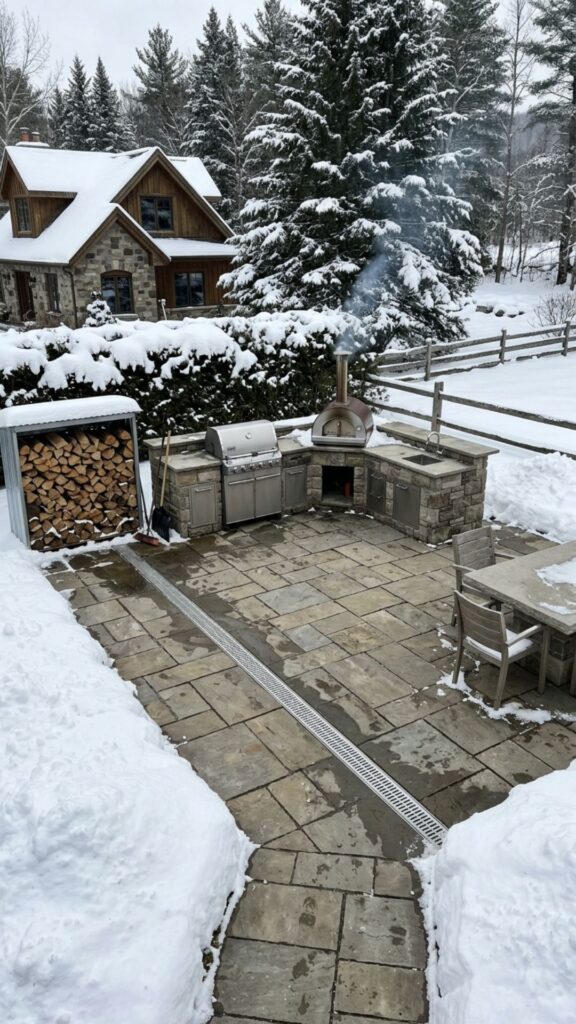
Standing water and packed snow lead to ice, rot, and slippery surfaces. Slope your patio slightly away from the house and install drains so melt runs off cleanly. This small design choice prevents big headaches later.
Keep a snow shovel and pet-safe ice melt nearby for quick cleanup. Avoid rock salt near stainless steel and stone, since it can stain and corrode. Sand offers traction without the chemical damage.
11. Install Bright, Warm Lighting
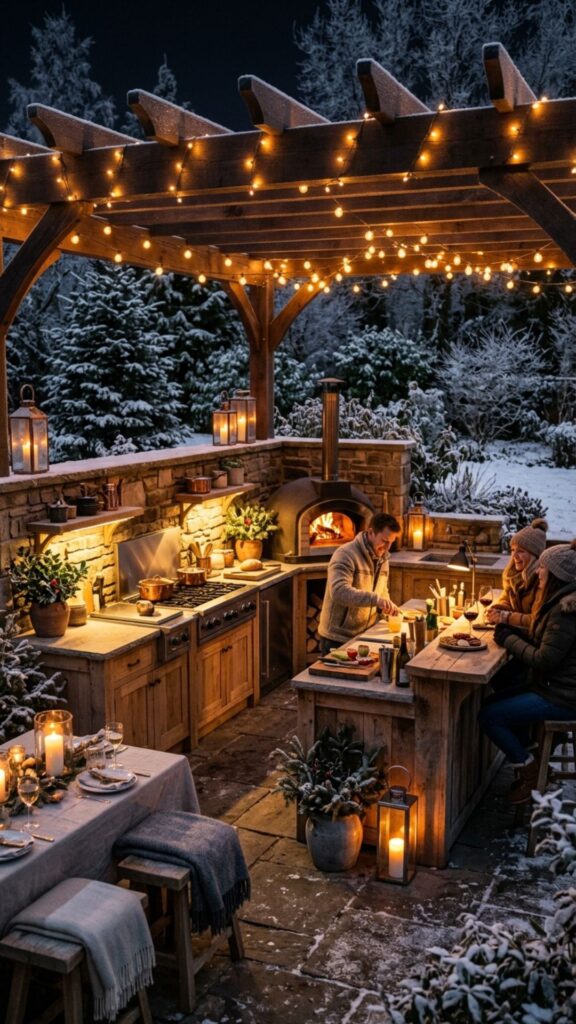
Winter days are short, so good lighting keeps your kitchen usable after dark. Layer task lighting over prep zones with warm ambient lights around seating. LED fixtures rated for outdoor and cold use won’t flicker or fail in the freeze.
Warm-toned bulbs, around 2,700K, make the space feel cozy rather than clinical. Add string lights or lanterns for atmosphere, and put everything on a timer or smart switch so the space greets you already lit.
12. Create an Enclosed Three-Season Room
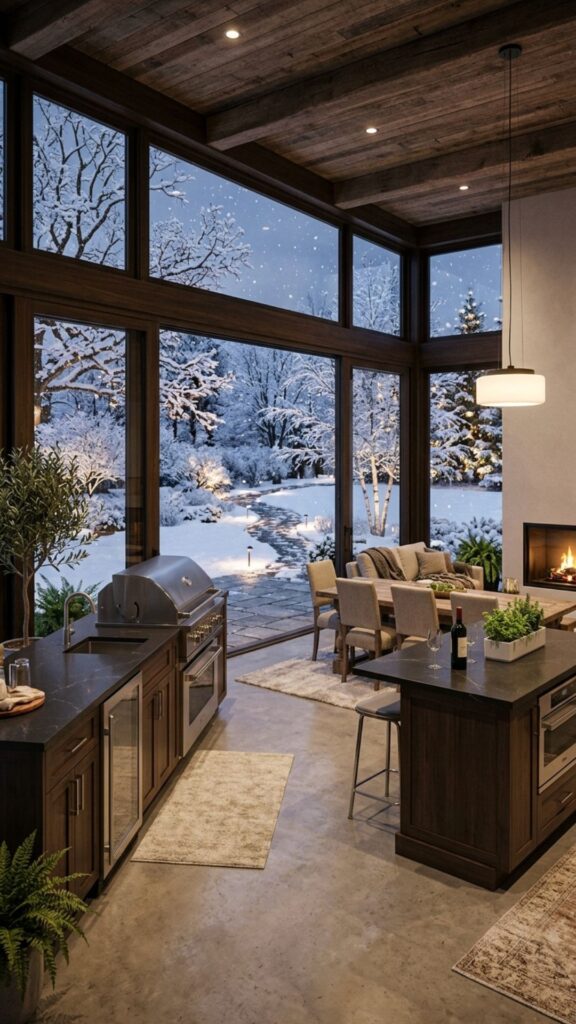
For serious winter cooks, an enclosed structure with removable glass walls offers the best of both worlds. Open it up in summer, seal it in winter, and cook comfortably year-round. Ventilation is essential here to clear smoke and fumes.
Add a ceiling fan and operable windows to keep air moving. This setup blurs the line between indoor and outdoor cooking, giving you a protected space that still feels connected to the yard.
13. Use Insulated Outdoor Refrigeration
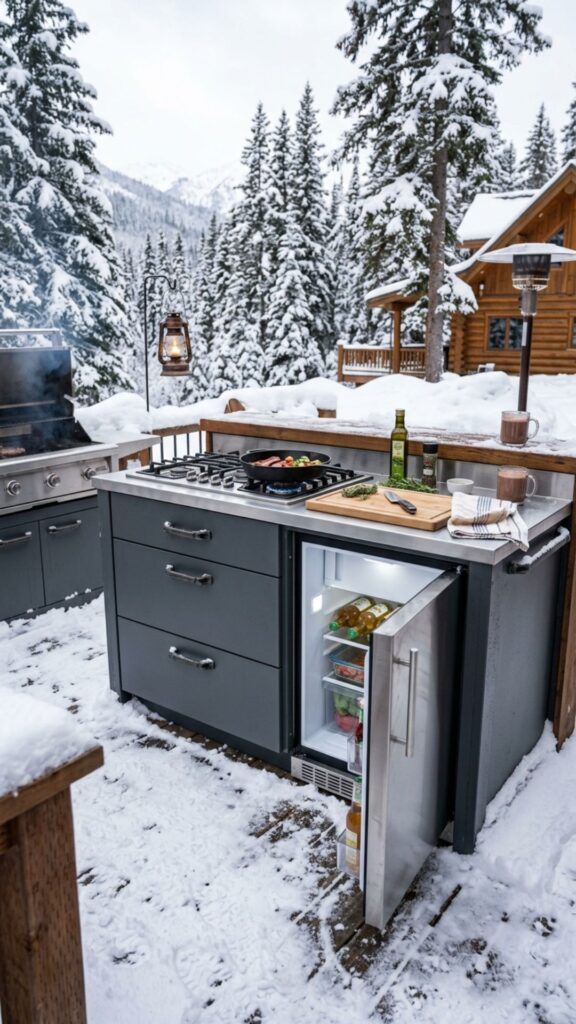
Standard fridges struggle in the cold and can shut off entirely below freezing. Choose outdoor-rated refrigerators built to run in low temperatures without damage. These units have better insulation and compressors designed for the elements.
Place the fridge inside an insulated cabinet for extra protection. In deep winter, some people simply use the cold air outside, but a proper outdoor fridge keeps drinks and ingredients at safe, steady temperatures all season.
14. Add Comfortable, Weatherproof Seating
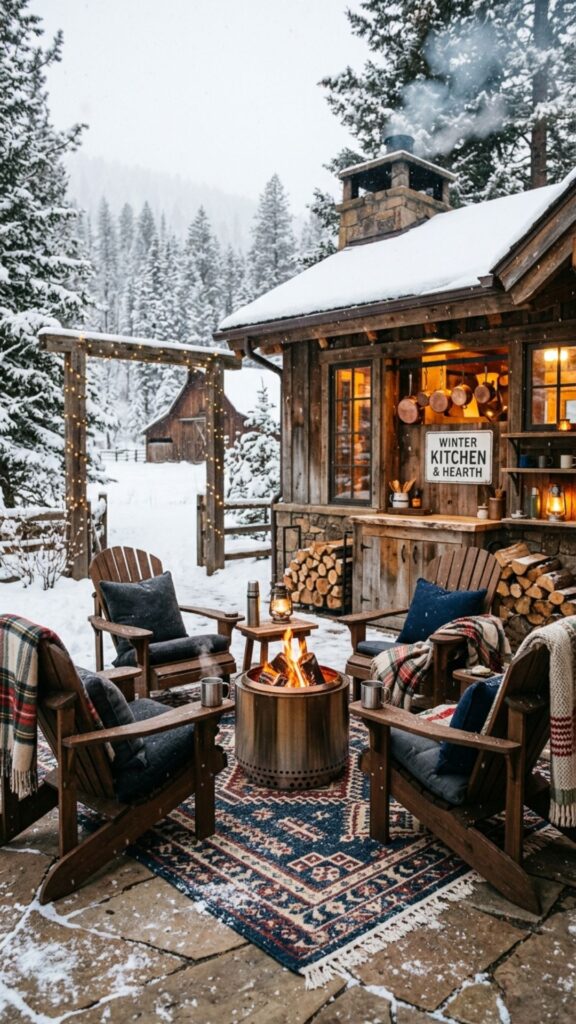
Cold metal or wet cushions send guests inside fast. Invest in seating with quick-dry foam and weatherproof fabric like solution-dyed acrylic. These materials shrug off snow and dry quickly once the sun returns.
Toss in a basket of wool blankets and a few outdoor floor rugs for warmth underfoot. Heated seat pads are a small luxury that make lingering outside on a cold night feel effortless.
15. Install a Ventilated Grill Hood
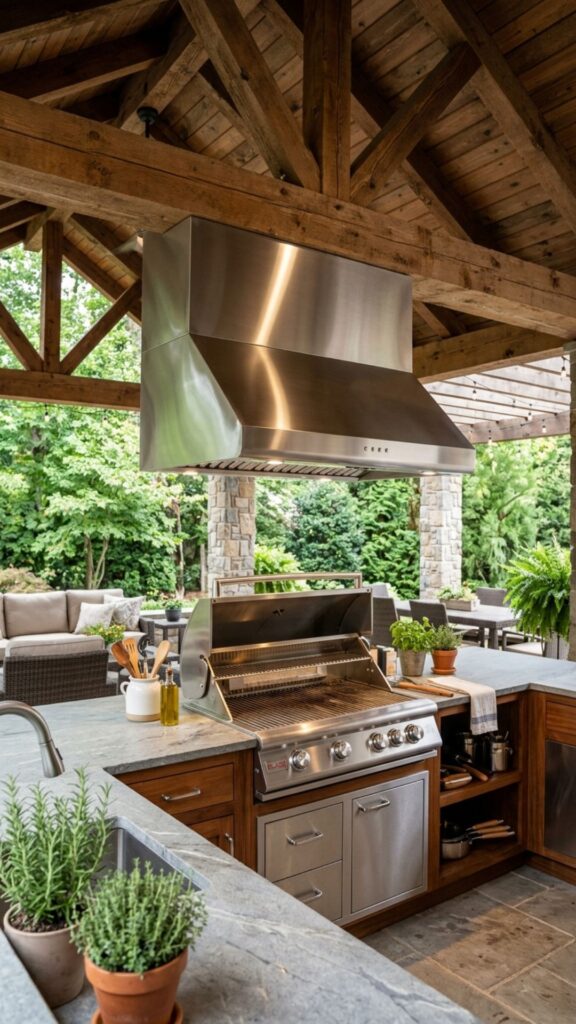
A proper vent hood matters even more in an enclosed or covered space. It pulls smoke, grease, and carbon monoxide away from your cooking zone, keeping the air safe and clear. Never grill under a sealed roof without ventilation.
Choose a stainless hood sized to your grill with a strong exhaust fan. Good ventilation also protects your roof and cabinets from greasy buildup that gets sticky and hard to clean in the cold.
16. Build with Freeze-Proof Plumbing
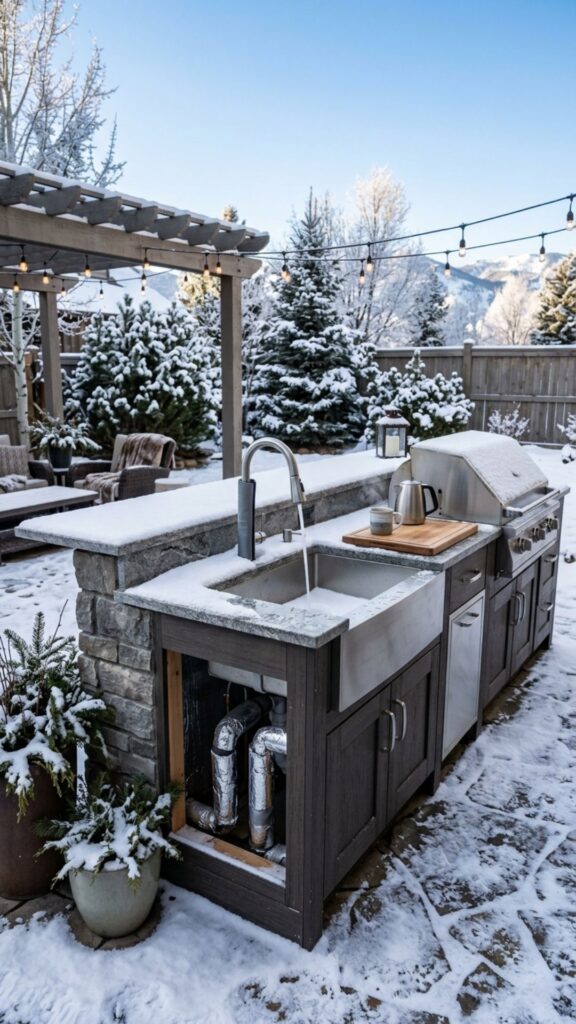
Frozen pipes are a costly winter surprise. If your outdoor kitchen has a sink, install shut-off valves and freeze-proof faucets so you can drain the lines before hard freezes. Insulate any exposed pipes with foam sleeves.
Slope pipes to drain fully and add a blowout valve for easy winterizing. These steps take an afternoon during installation but save you from burst pipes and flooded cabinets down the road.
17. Add a Warming Drawer or Heated Storage
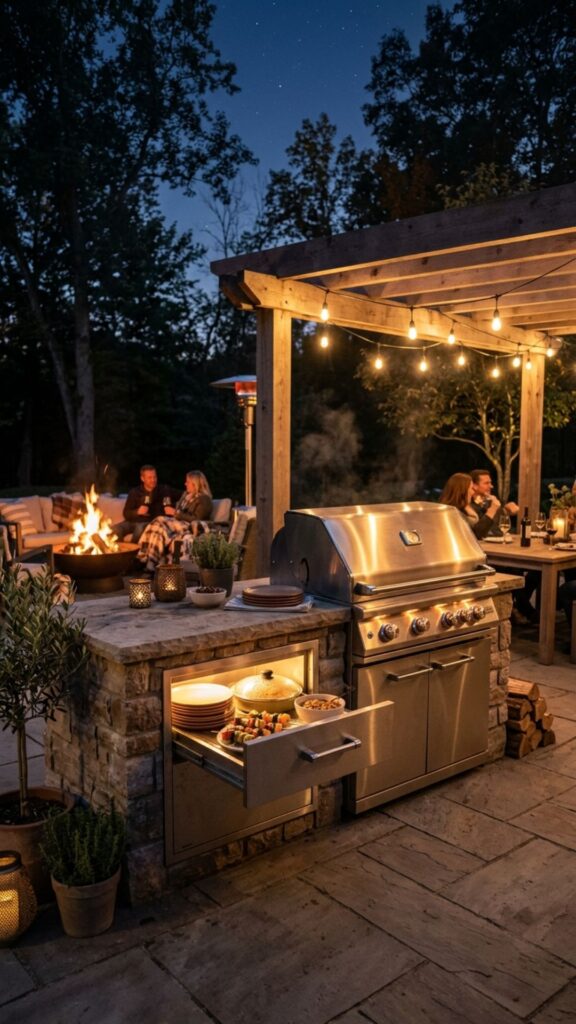
Food cools fast in freezing air. A warming drawer keeps plates and finished dishes hot while you cook the rest of the meal. It’s a simple upgrade that makes a huge difference when serving outdoors in winter.
Look for insulated, outdoor-rated models with adjustable temperature settings. Use it to hold bread, keep sauces warm, or stash serving platters so everything reaches the table hot and ready.
18. Use Modular, Portable Components
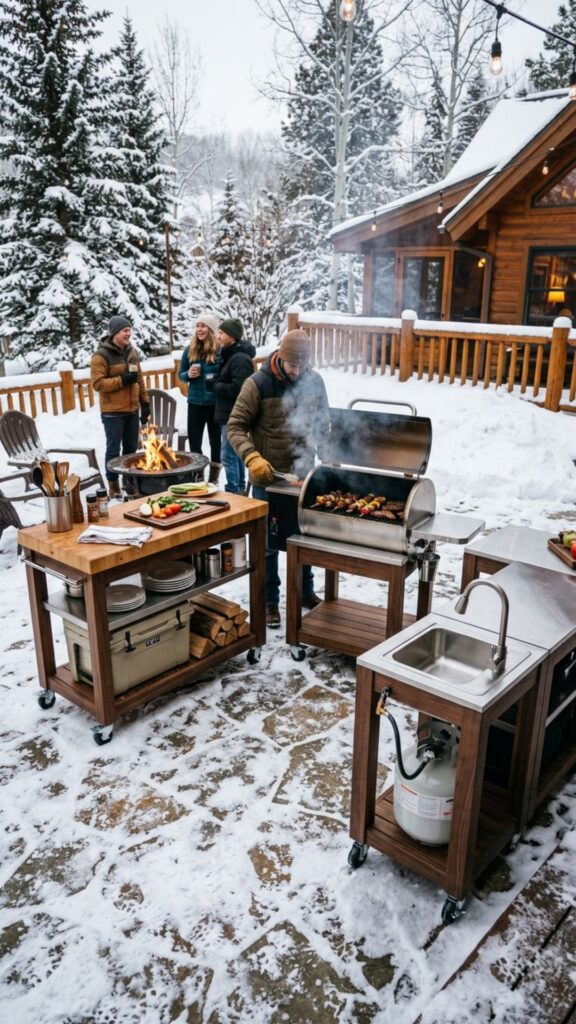
Modular carts and rolling stations let you rearrange your kitchen for the season. Move heat sources closer, tuck away summer-only gear, and reconfigure the flow to block wind. Flexibility keeps your space useful all year.
Portable propane grills and tabletop burners give you backup options if a built-in appliance struggles in extreme cold. Store the movable pieces in a shed or garage during the worst weather to extend their life.
19. Plan a Sheltered Cooking Nook
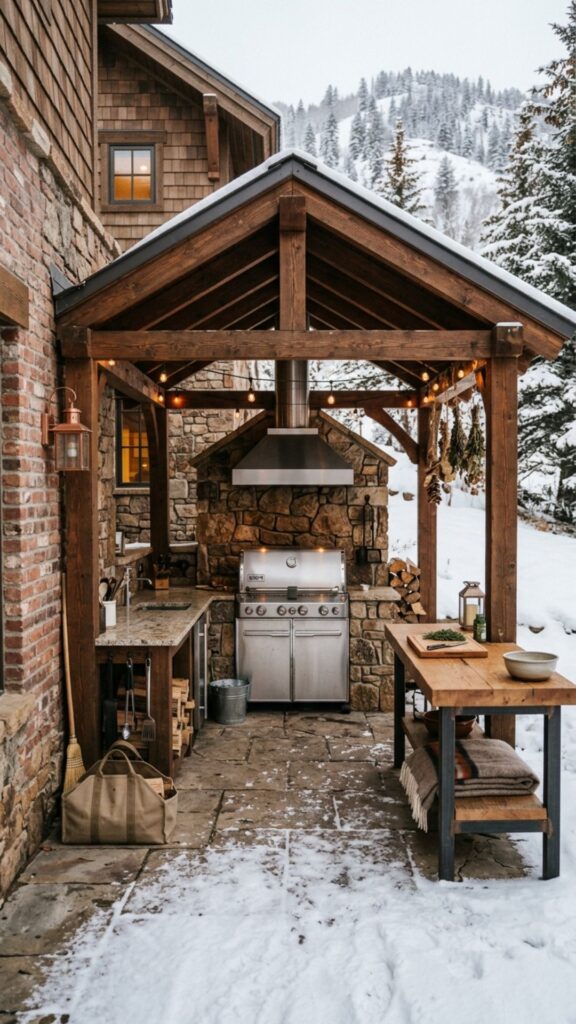
Tuck your main cooking zone against a wall or in a corner where two barriers meet. This creates a natural pocket of shelter from wind and blowing snow. Corners also trap radiant heat, making the spot warmer than open areas.
Position it near the house door for easy trips to the indoor kitchen. A short, protected path between the two spaces means you can shuttle ingredients without trudging through deep snow.
20. Winterize and Maintain Your Setup Each Season
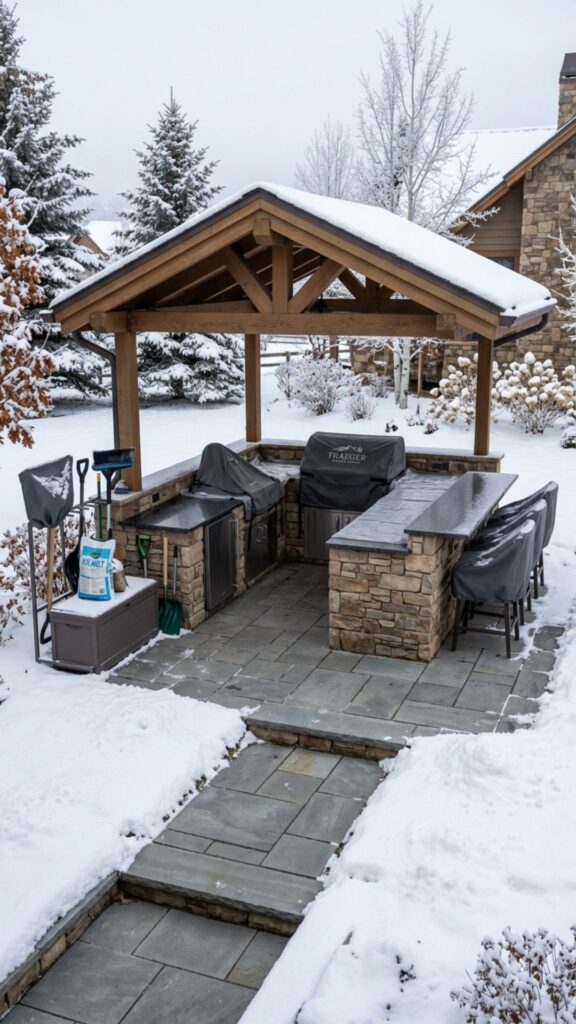
The best outdoor kitchen ideas for cold weather only work if you maintain them. Before winter, deep-clean appliances, drain water lines, seal countertops, and cover anything not built for exposure. A little effort now prevents spring repairs.
Use fitted, breathable covers to stop moisture from getting trapped underneath. Check on your space after big storms to clear snow buildup off roofs and canopies. Consistent care keeps everything running for years.
Conclusion: Start Building Your Cold-Weather Kitchen
Winter cooking outdoors is completely doable with the right mix of shelter, heat, and durable materials. Focus first on the essentials, a covered roof, reliable heaters, and weatherproof appliances, then layer in comfort touches like heated floors and cozy seating as your budget allows.
You don’t need all 20 ideas at once. Pick two or three that solve your biggest pain point, whether that’s wind, cold feet, or fading light, and build from there. Ready to get started? Grab a notepad, walk your space, and map out where warmth and shelter matter most. Your first frosty cookout is closer than you think.
Can you use an outdoor kitchen in winter?
Yes. With a covered roof, radiant heaters, wind barriers, and weatherproof appliances, you can safely cook outside all winter. Proper drainage and freeze-proof plumbing keep the space functional even in freezing temperatures.
What materials hold up best in cold weather outdoor kitchens?
Marine-grade 316 stainless steel, sealed granite or porcelain countertops, and powder-coated aluminum cabinets resist rust, cracking, and freeze-thaw damage best. Always choose appliances specifically rated for outdoor and cold-weather use.
How do I keep an outdoor kitchen warm in winter?
Combine overhead radiant heaters, a fire pit or fireplace, wind screens, and a sheltered corner layout. Radiant floor heating and heated seat pads add extra comfort so guests stay warm longer.
Do outdoor refrigerators work in freezing temperatures?
Standard fridges can shut off in extreme cold, so choose an outdoor-rated model built to run in low temperatures. Placing it inside an insulated cabinet adds protection and keeps it working reliably.
How do I winterize my outdoor kitchen?
Clean all appliances, drain and blow out water lines, seal countertops, and cover exposed equipment with breathable covers. Clear snow off roofs after storms and use pet-safe ice melt instead of rock salt.