Cooking on a Blackstone griddle is a joy, but a bare backyard setup can slow you down fast. You reach for a spatula and it’s inside. Your plates balance on a wobbly TV tray. Sound familiar? A little planning turns that chaos into a smooth, restaurant-style flow.
This guide is for weekend cooks and handy homeowners who want a functional outdoor space without hiring a contractor. I’ve built and rebuilt my own griddle station three times, so these ideas come from real trial and error, not just theory.
Here’s what’s inside: 20 practical, budget-friendly projects that make your griddle the heart of the backyard. Some take an afternoon. Others cost less than a takeout dinner. Let’s dig in.
1. Build a Simple Concrete Block Griddle Surround
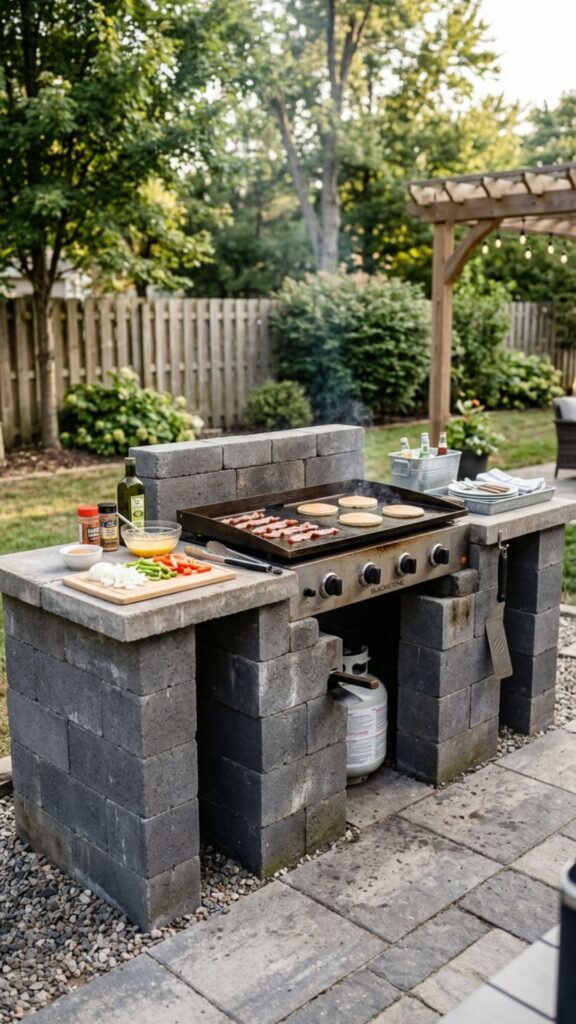
A surround made from concrete blocks is one of the easiest outdoor kitchen ideas DIY Blackstone owners can tackle in a single weekend. Stack blocks into a U-shape sized to fit your griddle, then top the sides with concrete pavers for instant landing space. No mortar needed if you keep it low and level.
Set it on a flat, compacted base so nothing shifts under the weight. I used 16-inch pavers on each side, giving me room for a cutting board and a stack of buns. The whole project cost me around $80 and took about three hours.
2. Create a Rolling Prep Cart on Casters
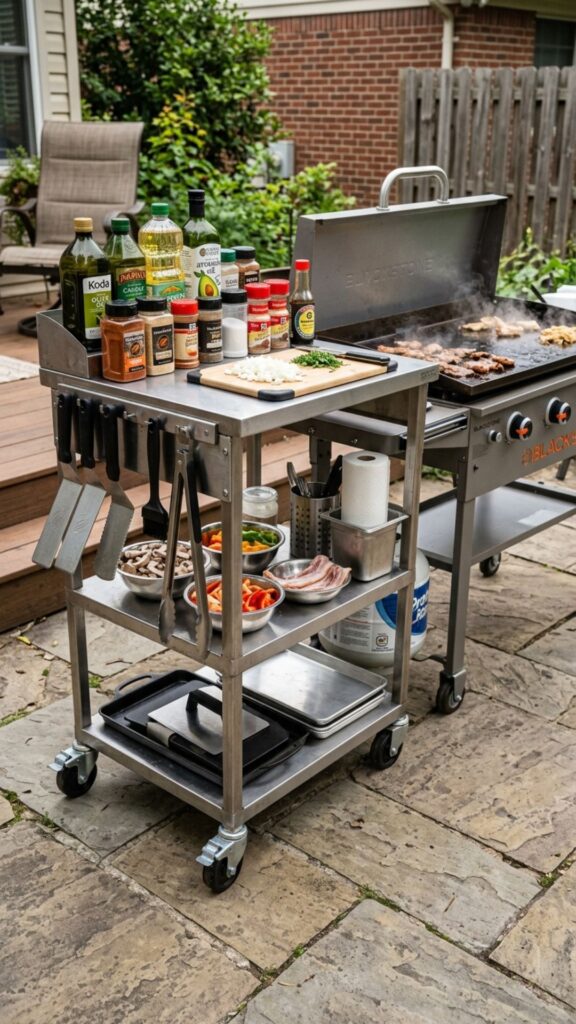
If you rent or like to rearrange, a rolling cart beats a fixed build every time. Grab a sturdy metal or wood cart, add locking casters, and you have a mobile prep zone that follows your griddle wherever it goes.
Look for one with a lower shelf for oil, scrapers, and paper towels. My cart holds all my griddle tools plus a squeeze-bottle caddy, so I stop running back and forth to the kitchen. Lock the wheels while cooking and you’re steady.
3. Install a Fold-Down Wall Shelf
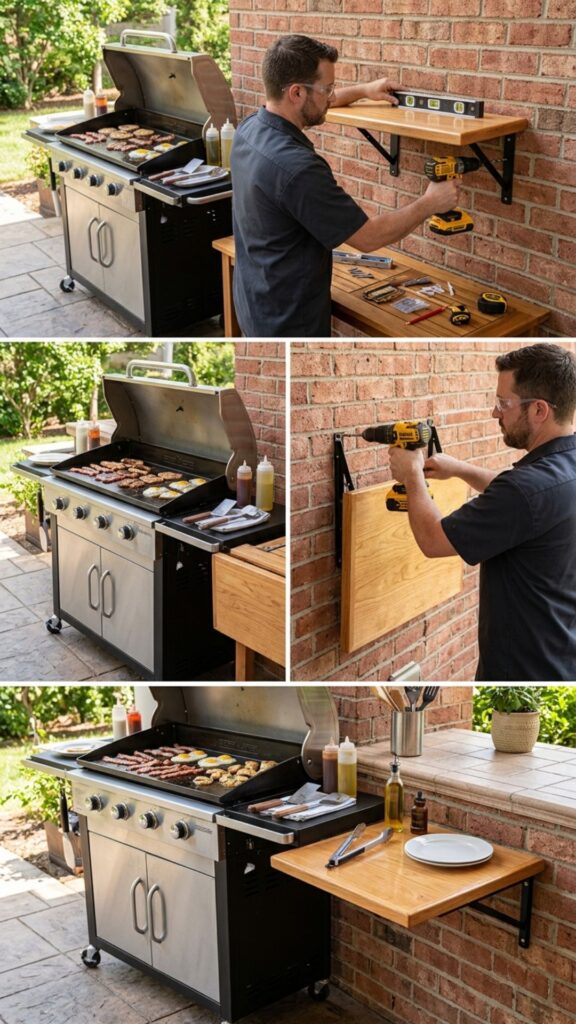
Short on space? A fold-down shelf mounted to a fence or exterior wall gives you a flat surface that disappears when you’re done. Use a heavy-duty piano hinge and a folding bracket rated for at least 40 pounds.
Position it at counter height, roughly 36 inches off the ground, so plating feels natural. Seal the wood with exterior polyurethane to fight weather. Mine has survived two winters of Midwest snow with just a light annual re-coat.
4. Frame a Custom Griddle Table From 2x4s
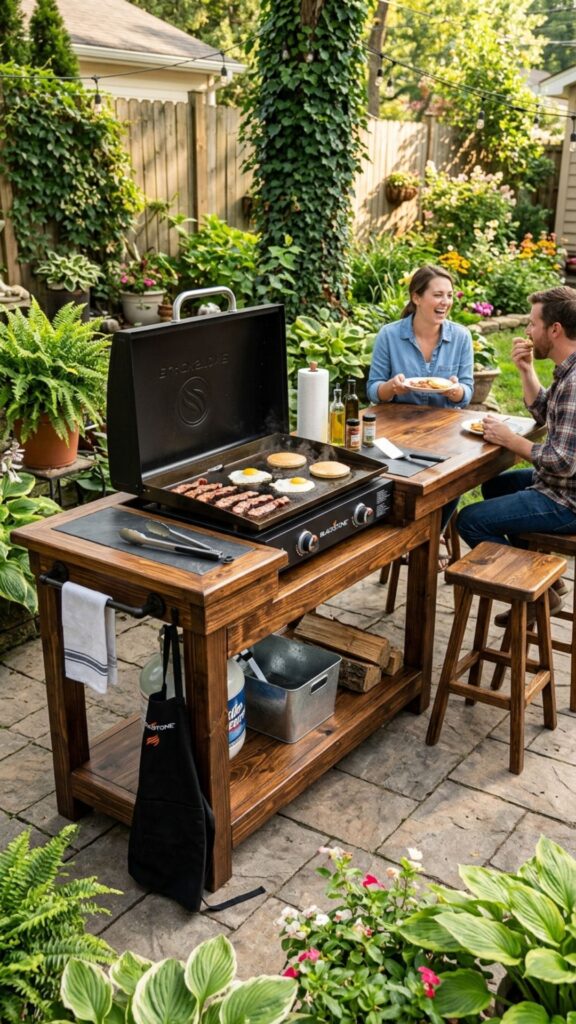
A dedicated 2×4 table sized to your exact griddle model keeps everything at the right height and adds serious prep room. Build a simple frame, add a plywood top, and cover it with cement board or tile for a heatproof surface.
Measure your griddle’s leg span first, then cut a snug drop-in opening if you want the surface flush. I added a 12-inch overhang on one side for a stool, turning it into a spot where guests keep me company while I cook.
5. Add a Weatherproof Storage Cabinet
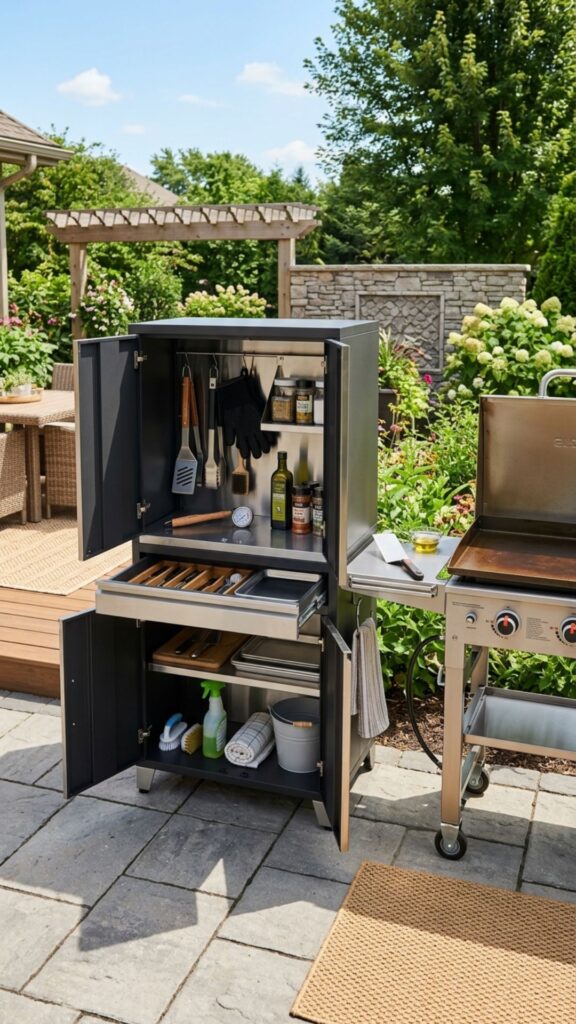
Nothing kills momentum like tools soaked from last night’s rain. A weatherproof cabinet keeps spatulas, seasoning, and propane accessories dry and within arm’s reach. Marine-grade plywood or a resin outdoor cabinet both work well.
Add a few interior hooks and a small bin for cleaning supplies. I keep my griddle conditioner, scraper, and grill wipes in one labeled drawer so cleanup takes two minutes, not ten.
6. Set Up a Dedicated Propane Tank Storage Spot
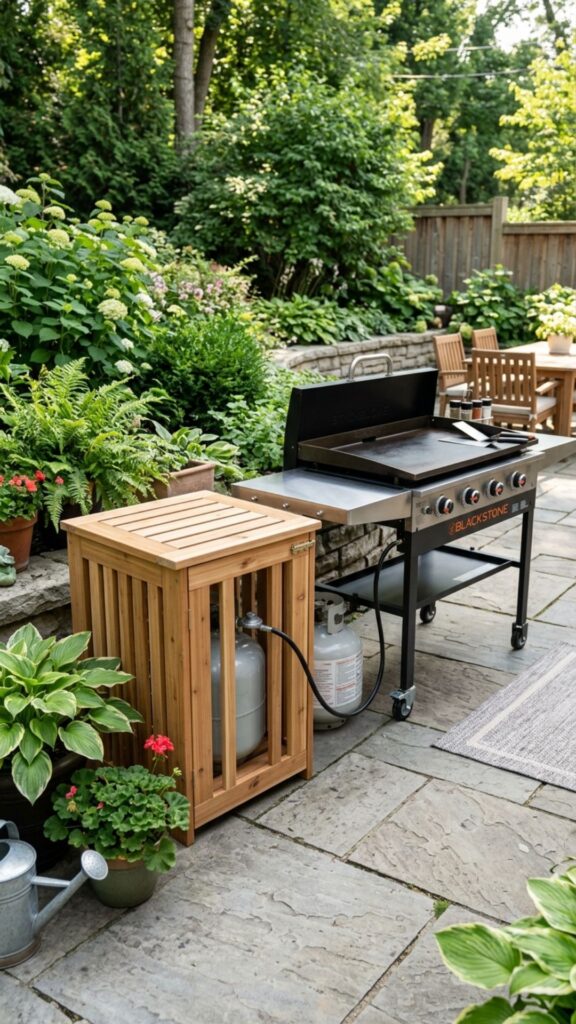
Loose propane tanks are a tripping hazard and an eyesore. Build a simple ventilated box or use a slatted crate to house the tank safely beside your griddle. Always keep it upright and in open air, never sealed tight.
I bolted a small tank holder to the side of my cart so the hose reaches without kinking. Good ventilation matters here for safety, so leave gaps between slats and never store tanks indoors.
7. Mount a Magnetic Tool Strip
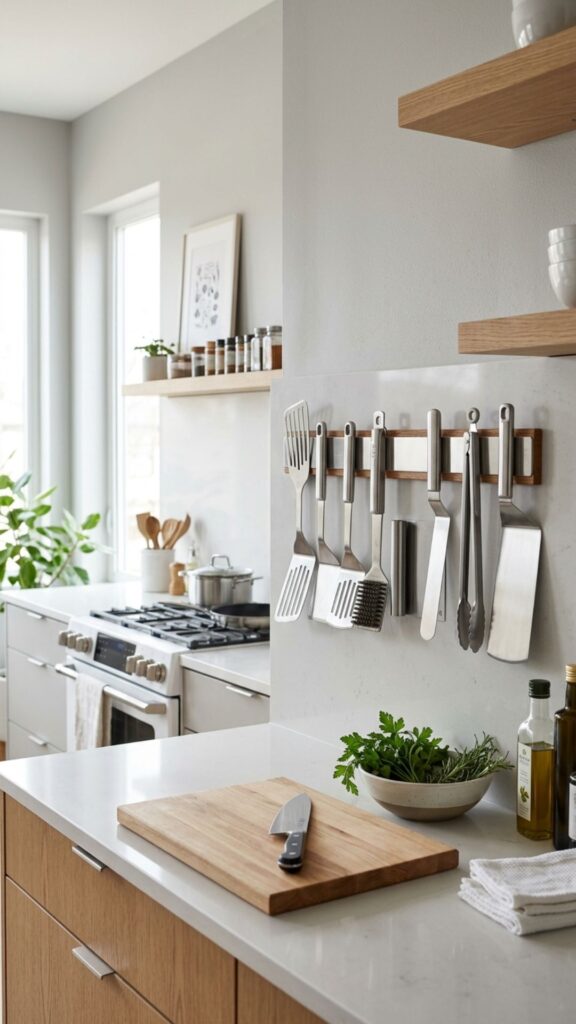
A magnetic knife strip screwed to a post or cabinet side holds your metal spatulas and scrapers in plain sight. No more digging through drawers mid-cook when the onions are about to burn.
Choose a strong rare-earth magnetic bar and mount it just above your prep surface. This one-dollar-a-tool upgrade shaved real seconds off my breakfast rush when I cook for a crowd of eight.
8. Build a Paver Patio Base for Stability
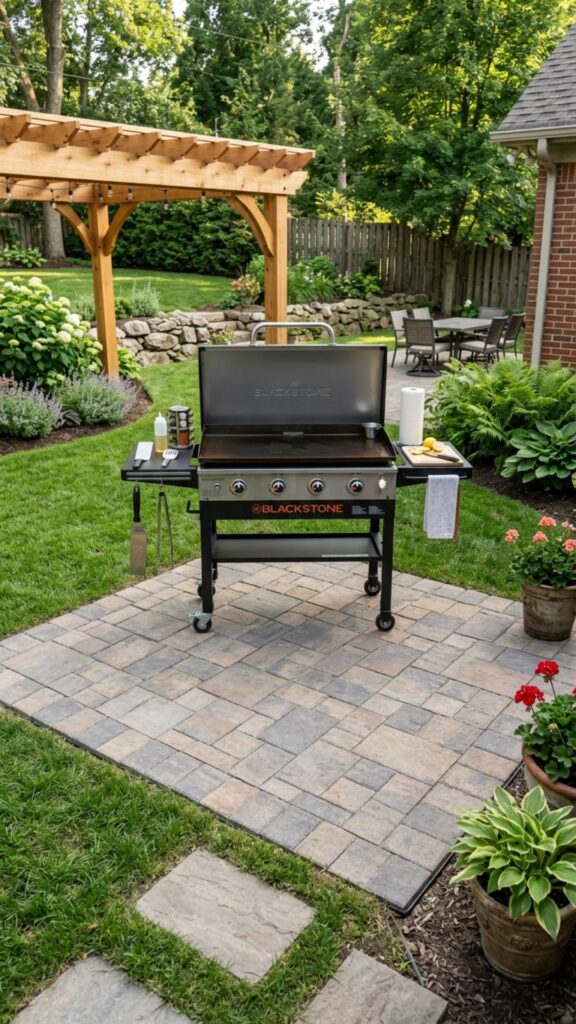
Griddles hate uneven ground. A small paver patio, even just 5 by 5 feet, gives your setup a solid, level foundation and keeps mud off your shoes. Lay landscape fabric, add paver base gravel, tamp it down, then set your pavers.
This base also defines your “kitchen zone” visually, which makes the whole space feel intentional. I finished mine with polymeric sand in the joints to stop weeds from creeping through.
9. Add an Outdoor Sink for Easy Cleanup
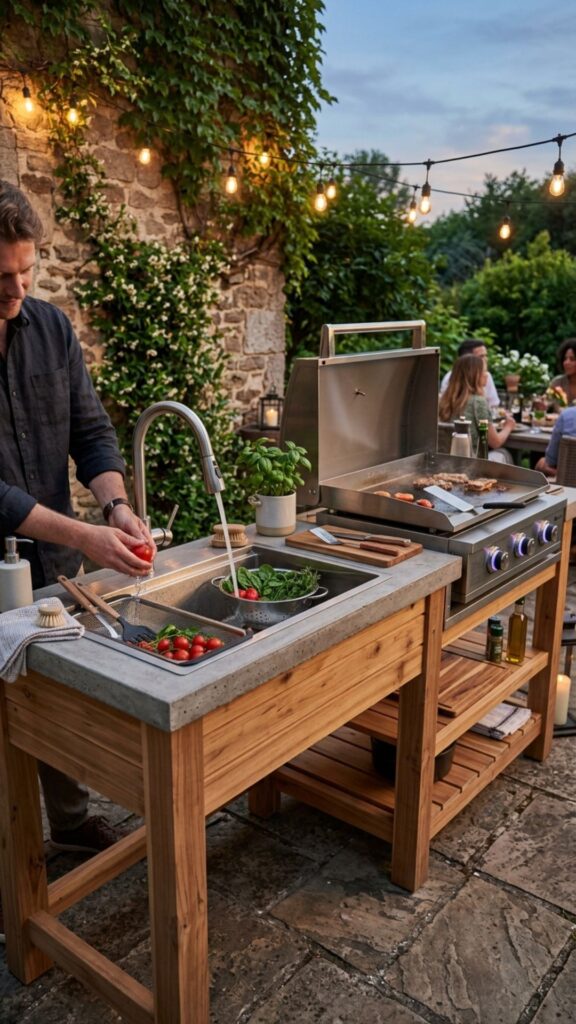
A basic outdoor sink transforms your griddle station from good to great. You don’t need plumbing. A garden hose feeds it, and a bucket or gray-water line catches the drain.
Mount it near your prep area so you can rinse hands and utensils without trekping inside. I use a portable camp sink with a foot pump, and it handles greasy hands and quick veggie rinses all season long.
10. Hang String Lights for Evening Cooks
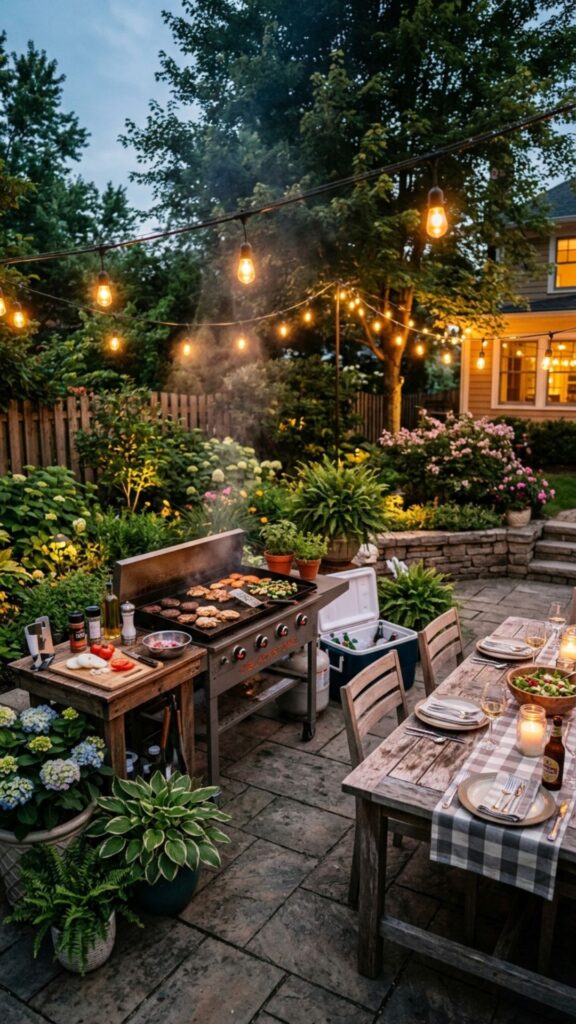
Great food doesn’t stop at sunset. Weatherproof string lights strung above your cooking zone let you griddle burgers well into the night. Run them along a fence, pergola, or a pair of posts.
Choose LED bulbs rated for outdoor use and plug them into a timer or smart switch. Warm-white lights around 2700K give a cozy glow without washing out the food. Guests linger longer when the lighting feels right.
11. Install a Wind Guard or Side Panels
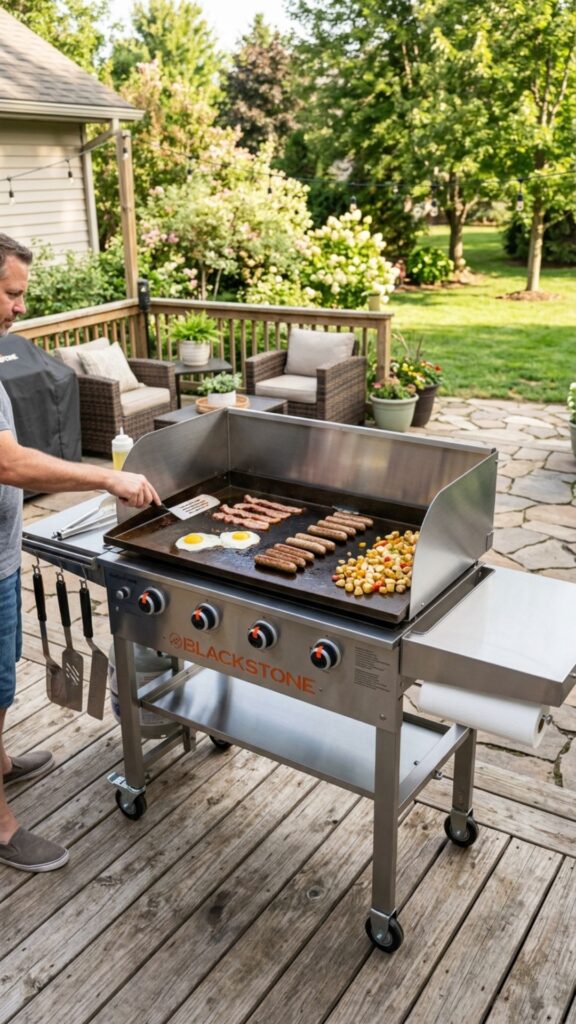
Wind steals heat and scatters your flame, making cooking uneven and slow. Simple side panels made from sheet metal or a folding wind screen keep your burners consistent, especially in open yards.
Attach panels to your surround or stake a freestanding screen behind the griddle. On breezy days, my sheet-metal wind guard cuts preheat time by a few minutes and keeps edge burners from sputtering out.
12. Create a Pull-Out Trash and Recycling Station
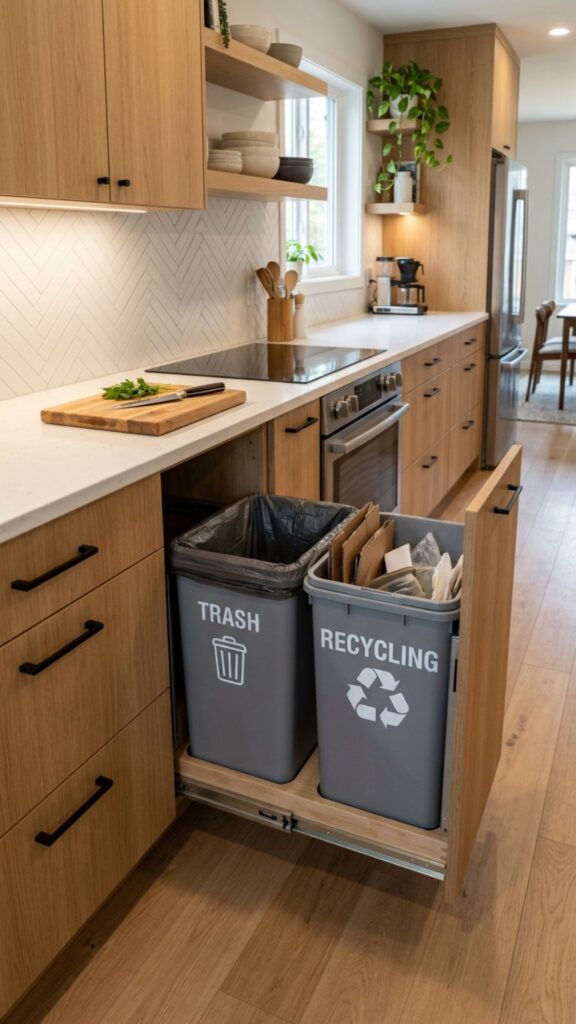
Grease-soaked paper towels and empty bottles pile up fast. A pull-out trash drawer or a pair of hooks holding bag rings keeps waste contained and off your counter.
Position it below your prep surface for a quick toss-and-continue flow. I built a two-slot version, one for trash and one for cans, using scrap plywood and drawer slides I already had in the garage.
13. Add a Spice and Sauce Caddy
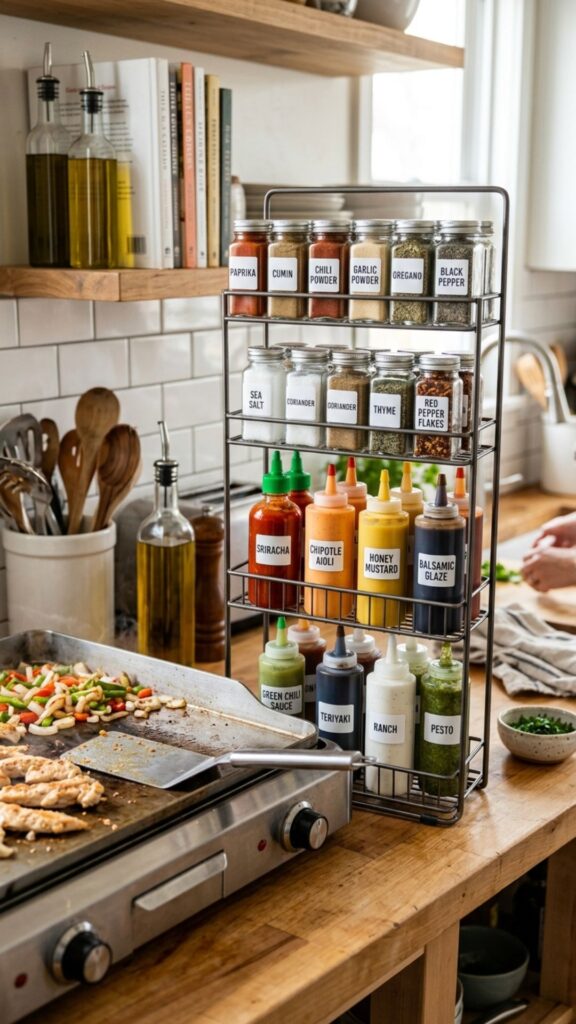
Keep your go-to seasonings within reach using a tiered caddy or a wall-mounted rack. Salt, pepper, garlic powder, and your favorite squeeze sauces should never be more than a hand’s reach away.
A lazy Susan works great on a round table corner. I labeled the lids so I can grab the right shaker by feel, which matters when I’m juggling pancakes and bacon at the same time.
14. Build a Bar-Height Seating Ledge
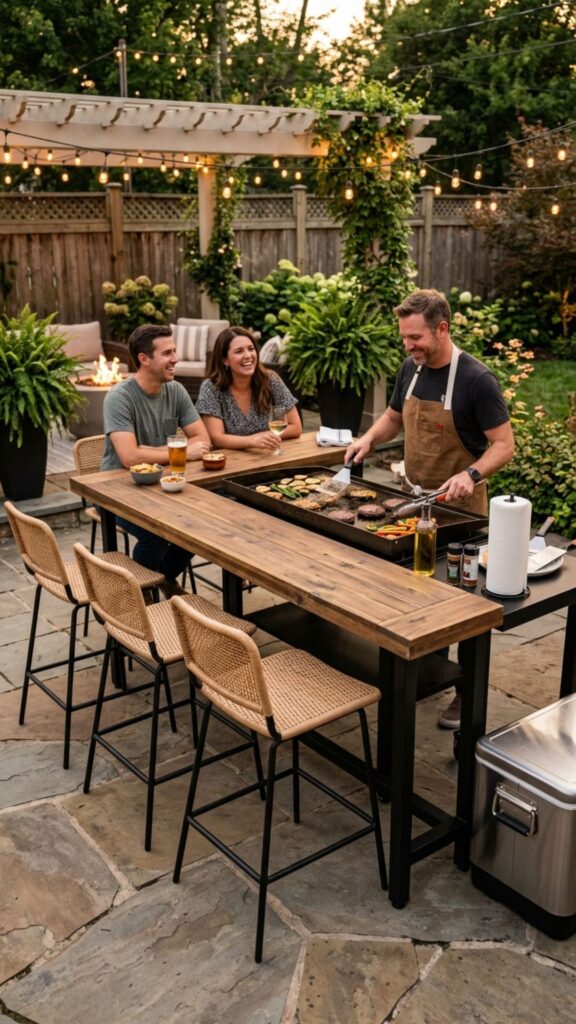
Turn your cook station into a social hub with a bar-height ledge. Add a 10-inch-deep shelf along the front edge at 42 inches high, then pull up a couple of outdoor stools.
Guests can sip a drink and chat while you flip smash burgers. This small addition changed how my family uses the backyard, since dinner prep now feels like part of the party instead of a chore.
15. Install a Pergola or Shade Structure Overhead
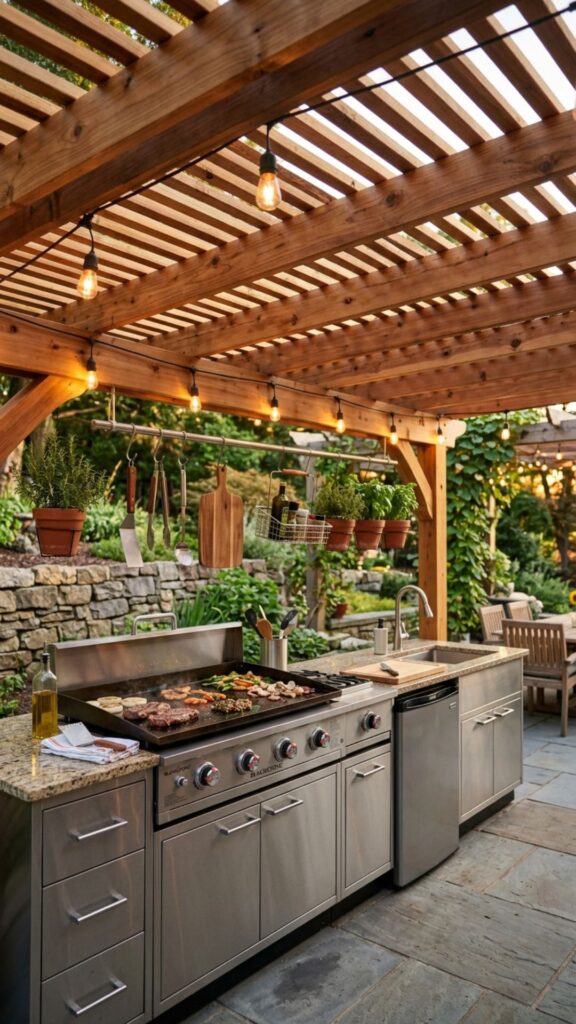
A pergola gives you shade in summer and a spot to mount lights, hooks, and even a fan. Freestanding kits go up in a day, or you can build one from 4×4 posts and 2×6 rafters.
Keep an open-slat top so heat and smoke escape freely. Never fully enclose the roof above a griddle. My cedar pergola made midday cookouts bearable when the sun used to drive us inside by noon.
16. Set Up a Rolling Cooler Cabinet
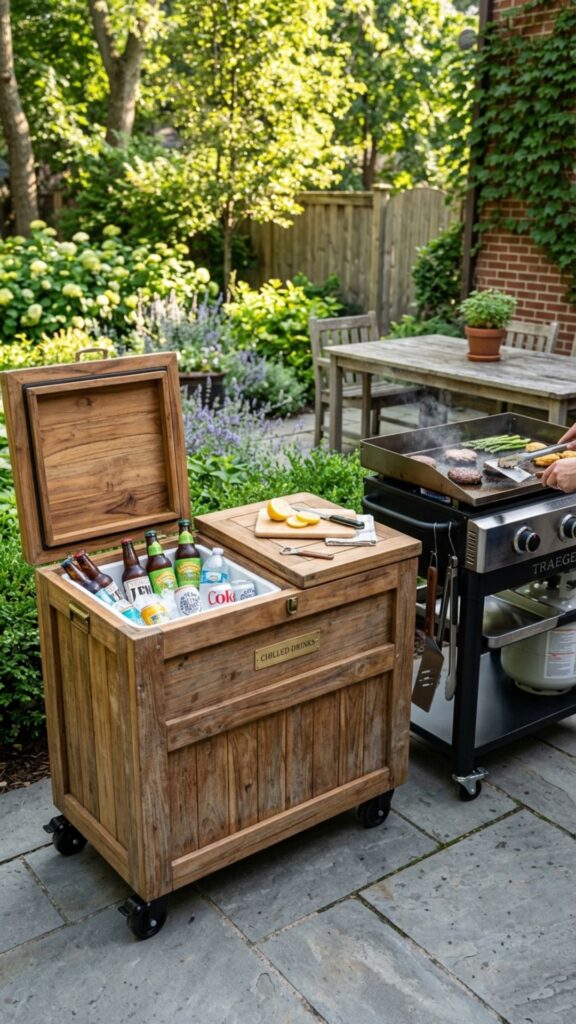
A cabinet built around a cooler keeps drinks cold and steps to a minimum. Frame a wood box that holds a standard cooler, add a hinged lid, and top the rest with a prep surface.
Drain the melted ice through a spigot instead of hauling the whole thing. I keep sodas on the left and marinating proteins on the right, so nothing warms up while I finish the sides.
17. Add Hooks and Rails for Hanging Tools
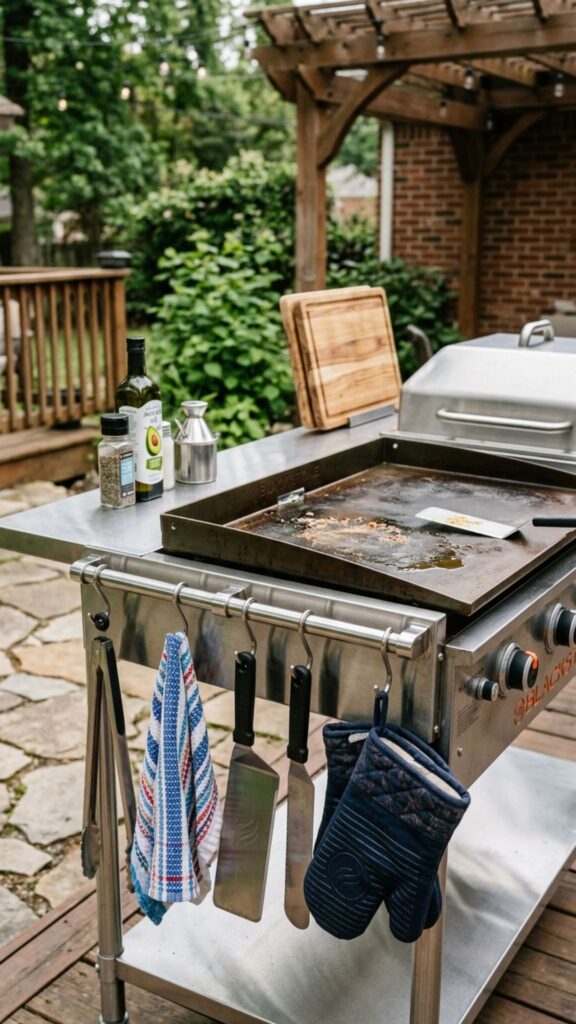
A simple towel rail or a row of S-hooks along your table edge holds tongs, towels, and oven mitts. This clears your prep space and keeps essentials visible.
Stainless rails resist rust and wipe clean easily. I hung mine on the right side since I’m right-handed, a tiny tweak that makes reaching for tools feel automatic.
18. Create a Griddle Cover Storage Solution
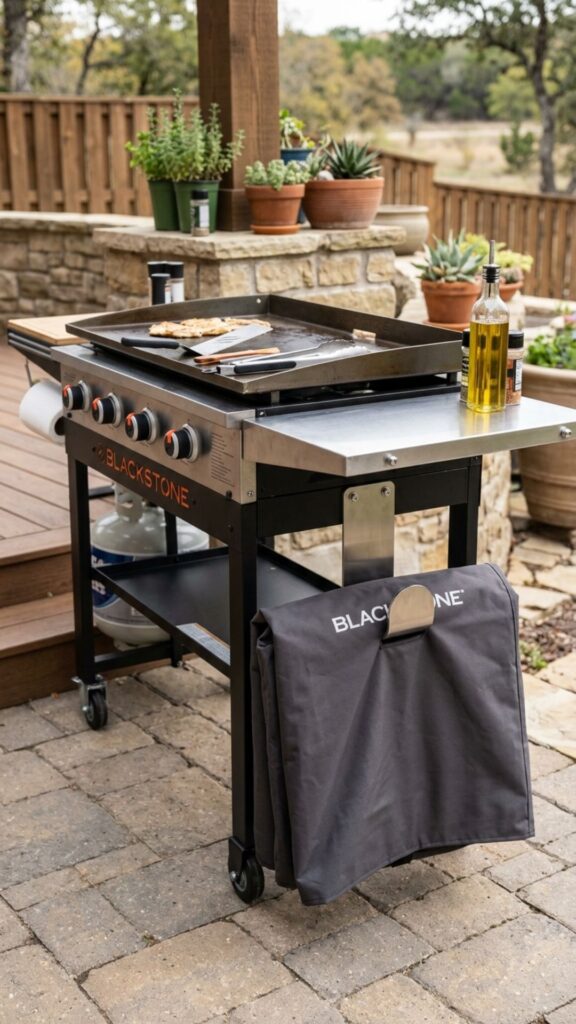
Your griddle cover protects your investment, but it needs a home when you’re cooking. Add a dedicated hook or a small rolled-cover bin so it doesn’t end up on the ground collecting dirt.
A clean cover means a clean griddle top every time you start. I mounted a single large hook on the side of my cabinet, and my cover has stayed spotless for two full seasons.
19. Build a Firewood or Charcoal Nook
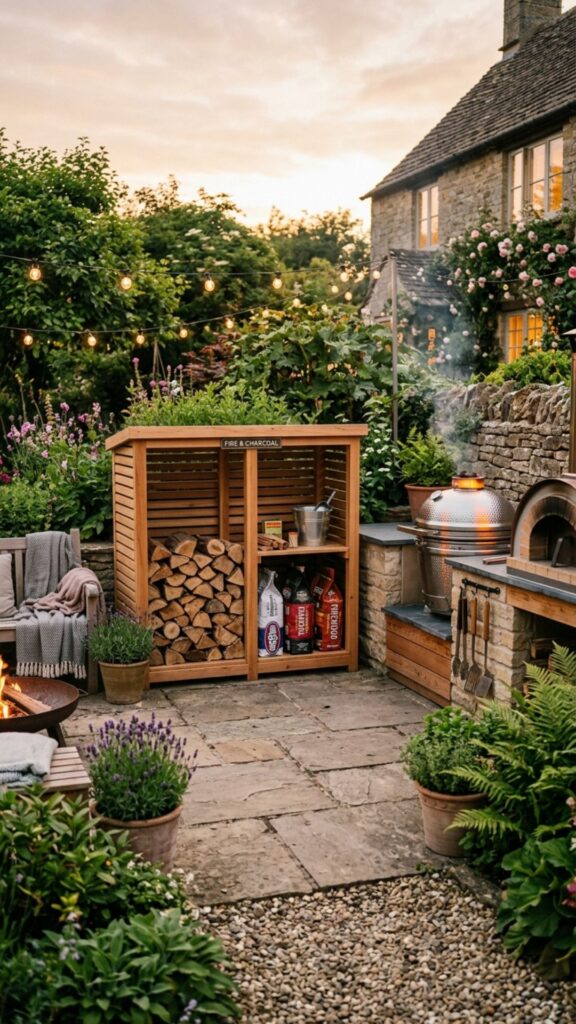
If you pair your griddle with a smoker or fire pit, a small storage nook for wood or charcoal keeps fuel dry and organized. A slatted box with a slanted roof sheds rain while allowing airflow.
Stack it near, but not touching, your cooking zone for safety. I keep a week’s worth of splits on hand, so I’m never scrambling when friends decide to stay for round two.
20. Add a Decorative Backsplash for Style and Function
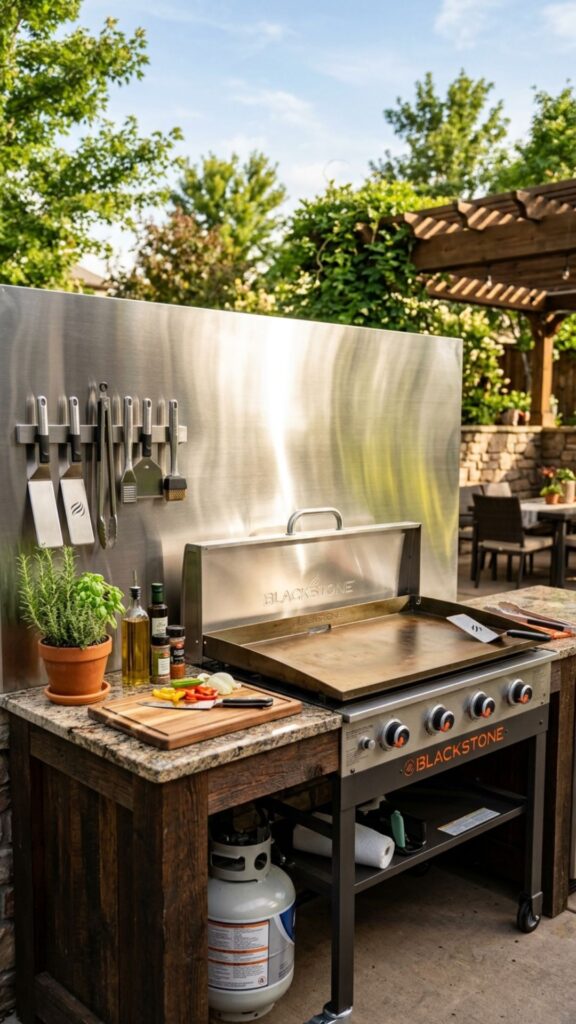
A backsplash isn’t just for looks. Mounted behind your griddle, it blocks grease splatter from your fence or wall and wipes clean in seconds. Use stainless sheet, peel-and-stick tile, or sealed cement board.
Pick a finish that matches your patio vibe. My brushed-steel panel catches oil spray that used to stain the fence, and it makes the whole setup look like a pro kitchen for under $50.
Bringing It All Together
You don’t need a big budget or contractor to build a griddle station you’ll love. Start with a stable base and one prep surface, then add storage, lighting, and comfort features as you go. Even three or four of these projects will completely change how you cook outdoors.
The best part? Each idea stands on its own. Pick the one that solves your biggest daily annoyance, and build it this weekend. Then keep going. Grab a tape measure, choose your first project from the list above, and turn your backyard into the cookout headquarters your neighbors envy.
How much does it cost to build a DIY Blackstone outdoor kitchen?
A basic DIY Blackstone station costs $80 to $300 using concrete blocks, pavers, and lumber. A fuller build with cabinets, a sink, and shade can run $500 to $1,500, still far below a professional install that often tops $5,000.
What countertop material is safe next to a Blackstone griddle?
Heatproof surfaces like cement board, tile, stainless steel, or natural stone are safest beside a griddle. Avoid bare wood or plastic near the cook zone, since radiant heat and grease can scorch or warp them over time.
Can I build an outdoor kitchen for my griddle on a patio or deck?
Yes. Use a level, stable base and keep the griddle on a heatproof surface. On a wood deck, add a fireproof mat and maintain clearance from railings and walls. Never enclose the griddle fully, since it needs open airflow.
Do I need a permit to build a DIY outdoor griddle station?
Most freestanding, non-plumbed griddle setups don’t require a permit. Permits usually apply once you add gas lines, plumbing, or a permanent roofed structure. Check your local building codes before starting any fixed installation.
What's the easiest outdoor kitchen project for beginners?
A concrete block griddle surround is the easiest starting point. It needs no mortar, sets up in a few hours, and gives you instant prep space on both sides for under $100.