Your family is growing, your mornings are getting louder, and your kitchen feels like it’s shrinking by the day. Whether you’re squeezing past each other to reach the cereal or fighting over counter space while packing school lunches, a cramped kitchen puts real pressure on family life.
A well-planned kitchen extension can change all of that. It gives your family room to breathe, cook, eat, and even do homework — all in one well-connected space.
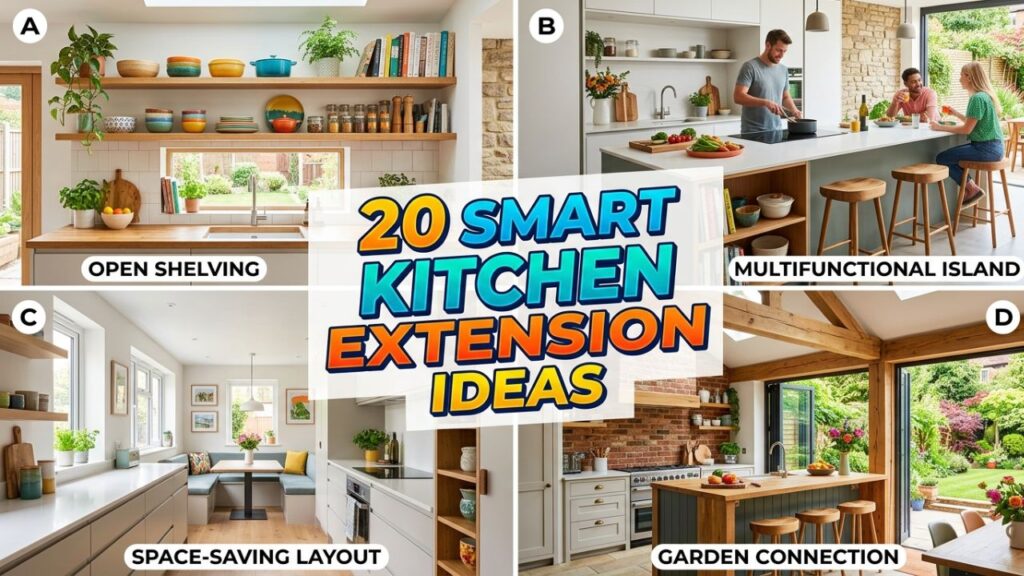
In this guide, you’ll find 20 practical, family-tested kitchen extension ideas that cover layout, storage, lighting, dining, durability, and budget. Whether you’re just starting to explore your options or already talking to a builder, there’s something here to help you plan smarter.
1. Go Open-Plan With a Rear Extension
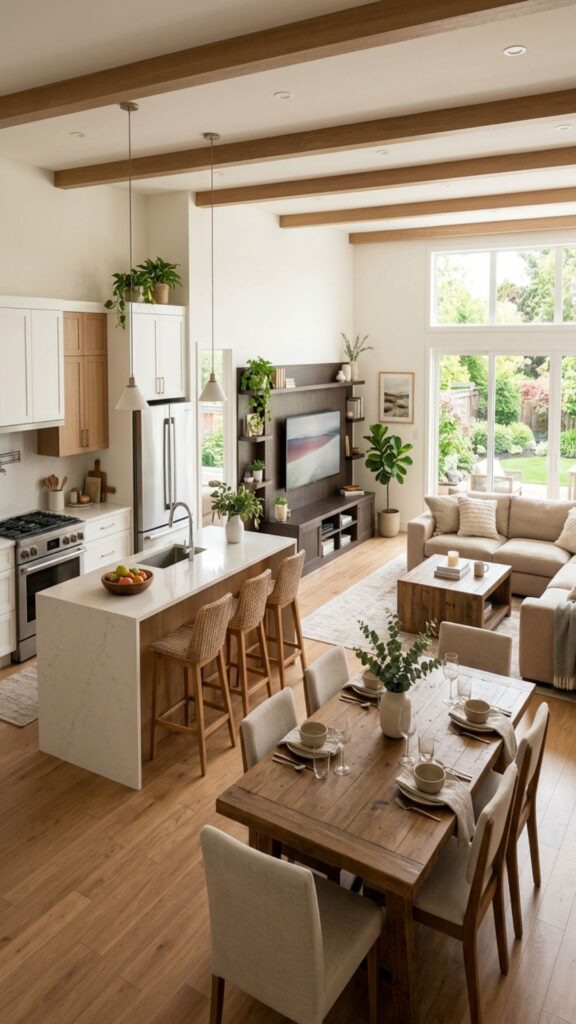
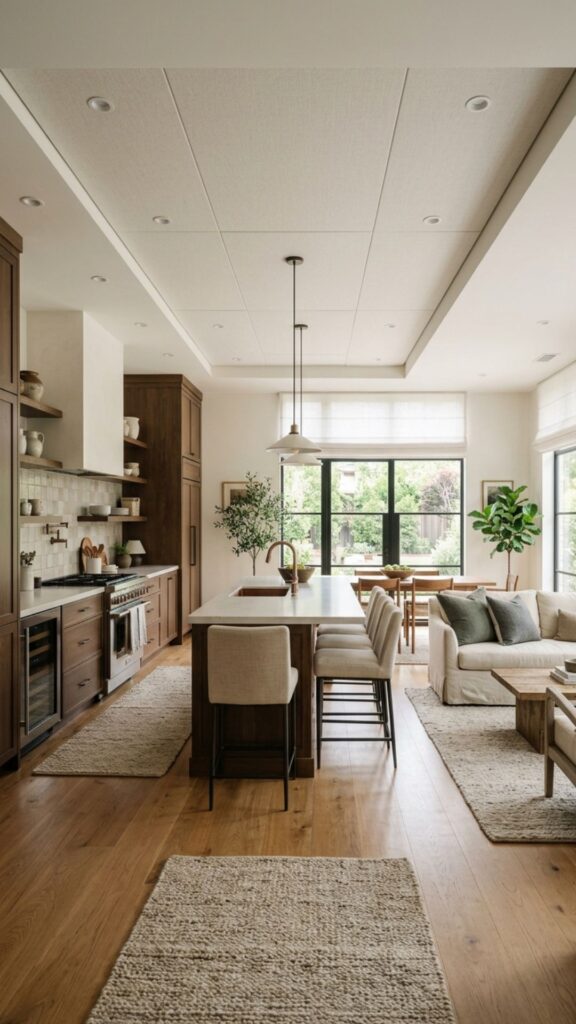
A rear kitchen extension is one of the most popular choices for growing families, and for good reason. Knocking through the back wall creates a connected kitchen-diner-living area where everyone can be in the same space — whether that’s cooking dinner, doing homework, or watching TV.
When planning this layout, think carefully about how you’ll zone the space. Use different flooring, ceiling heights, or a kitchen island to visually separate cooking and relaxing areas without putting up walls. This keeps the space functional without feeling like one big room with no purpose.
2. Add a Side-Return Extension for Extra Width
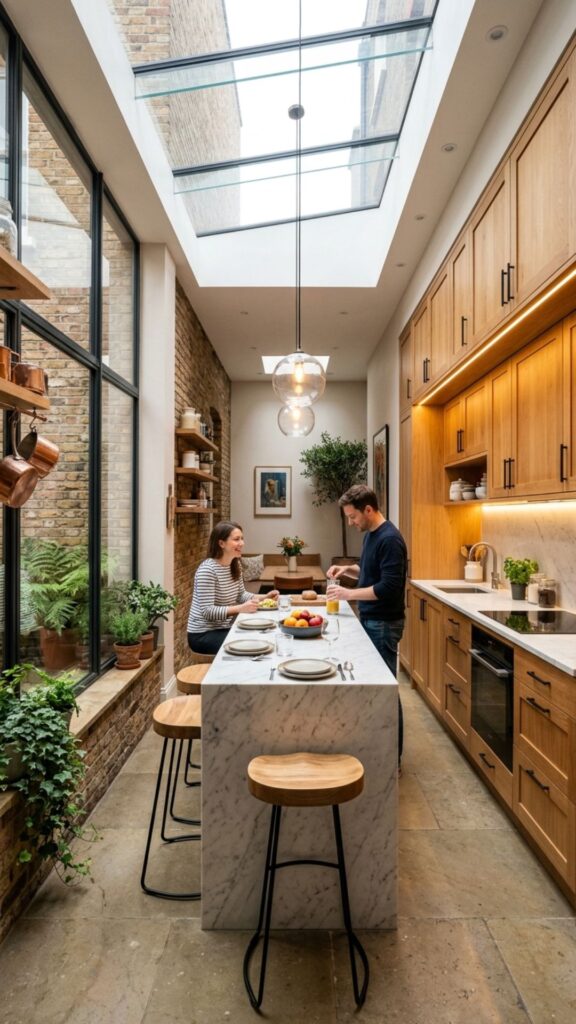
Many terraced and semi-detached homes have a narrow side-return alley that goes completely unused. Converting this into part of your kitchen adds significant floor space — typically between 1 and 2 meters — without a full rear extension.
That extra width makes a genuine difference. It’s often enough to fit an island, a proper dining table, or a wider kitchen run with more storage and appliances. Side-return extensions are also generally less disruptive to plan and build, which is worth considering if you have young children at home during construction.
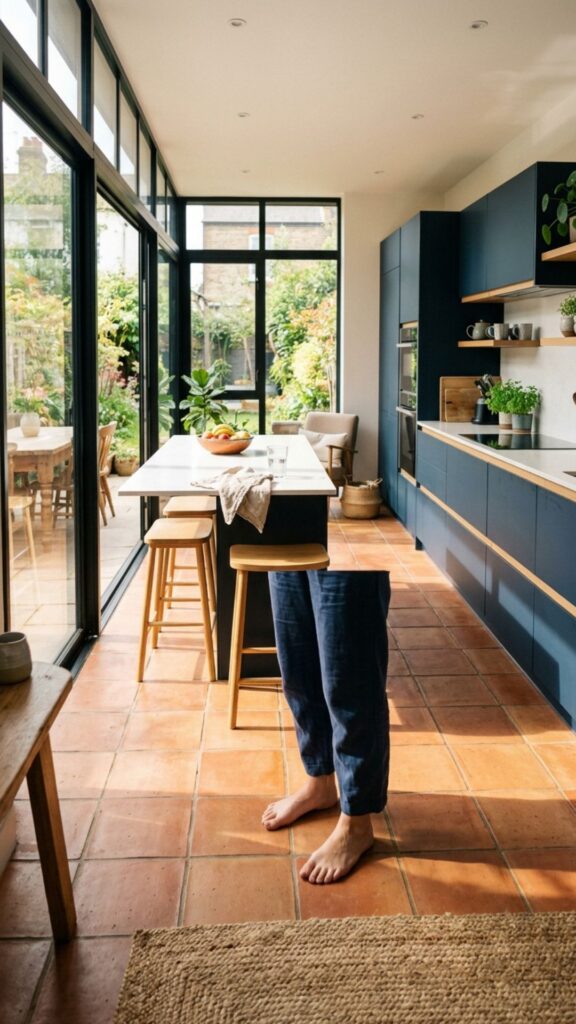
3. Install Bifold or Sliding Doors to the Garden
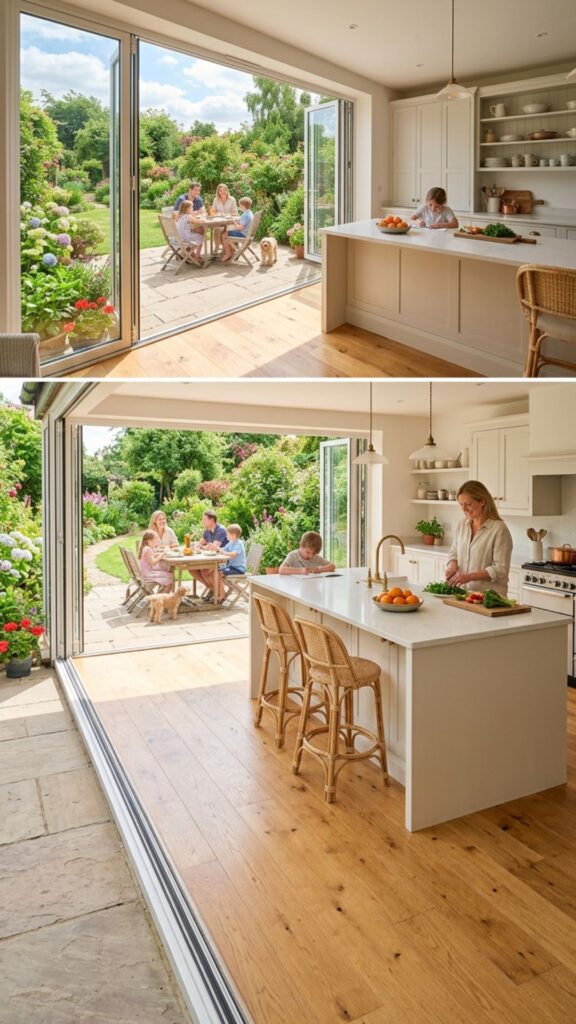
Large glazed bifold or sliding doors at the back of your kitchen extension blur the line between indoors and outdoors. During warmer months, you can open the whole wall and extend your living space into the garden — ideal for family barbecues or just keeping an eye on the kids while you cook.
From a practical standpoint, choose thermally efficient double or triple-glazed units to keep heating costs manageable. Sliding doors work well in tighter spaces where bifolds need room to stack. Either option floods the kitchen with natural light, which makes even a modest extension feel much larger.
4. Design a Layout That Flows for Busy Households
When multiple people use the kitchen at the same time — which is every morning in a family home — layout becomes critical. The classic “work triangle” linking the hob, sink, and fridge is a good starting point, but families also need clear pathways that don’t cross cooking zones.
Consider a galley layout on one side with a breakfast bar or island on the other. This separates the cooking area from the traffic flow, so children can grab a snack or sit at the island without getting in the cook’s way. Plan for at least 1.2 meters between parallel surfaces to keep movement comfortable.
5. Build in a Dedicated Homework Zone
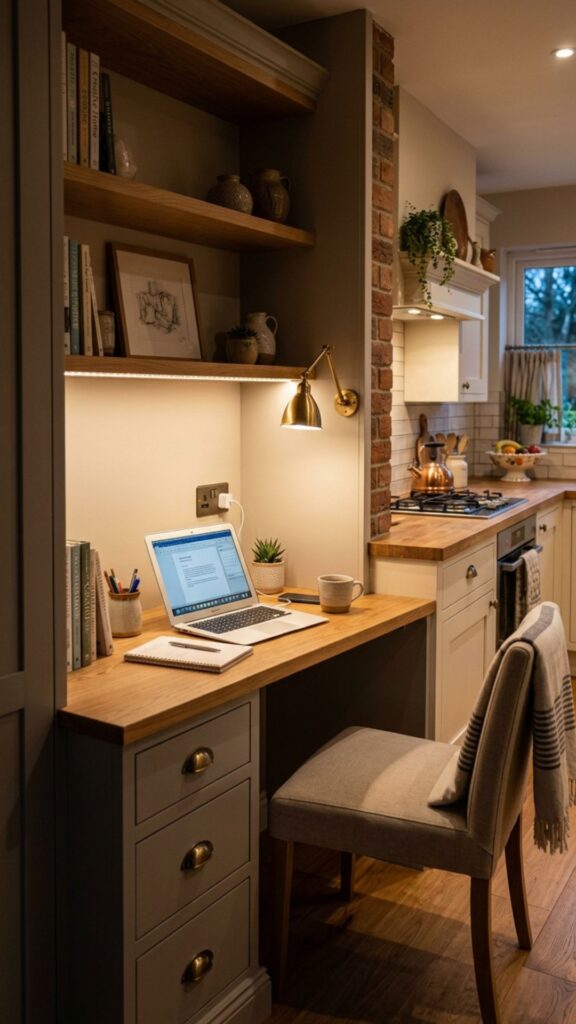
One of the most practical things you can add to a kitchen extension is a built-in homework desk or study nook. A simple counter-height surface along one wall, fitted with plug sockets and good lighting, gives children a place to work while staying connected to the family.
This kind of space is especially useful during the after-school rush when dinner is cooking and everyone is trying to decompress. Keep it minimal — a deep shelf, a couple of drawers for stationery, and a pendant light above — so it doesn’t dominate the room but is genuinely usable every day.
6. Maximise Storage With Floor-to-Ceiling Cabinetry
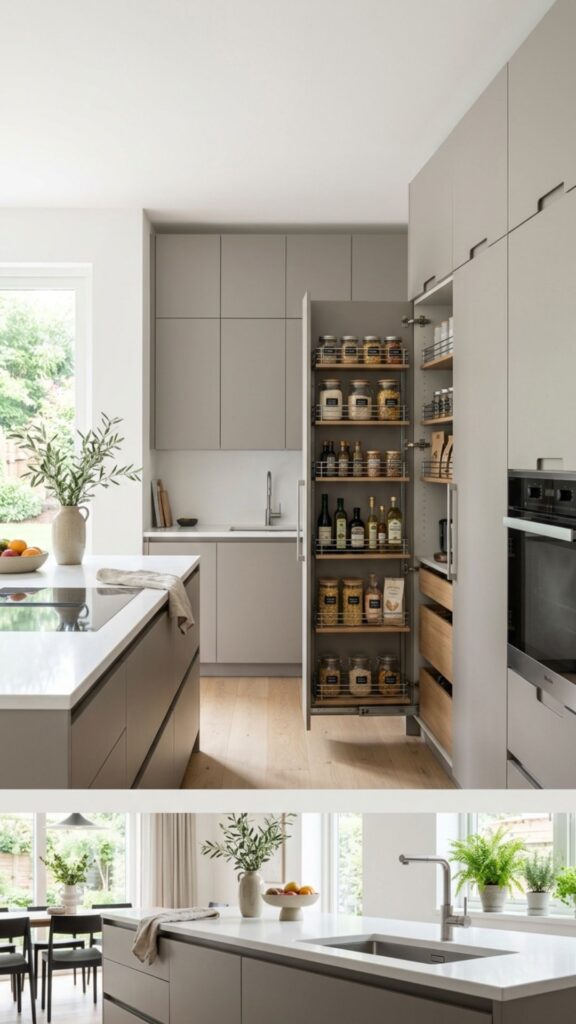
Growing families accumulate a lot — food, gadgets, packed-lunch boxes, sports bottles, school bags. Building floor-to-ceiling cabinetry into your kitchen extension means every centimetre of vertical space works hard. It dramatically increases your storage capacity without increasing the room’s footprint.
Choose a mix of deep lower drawers for pots and pans, mid-height cupboards for everyday items, and upper cabinets for things you use less often. Pull-out pantry units and corner carousel fittings help you access everything without digging through cluttered shelves. Good storage keeps surfaces clear, which makes the whole space calmer.
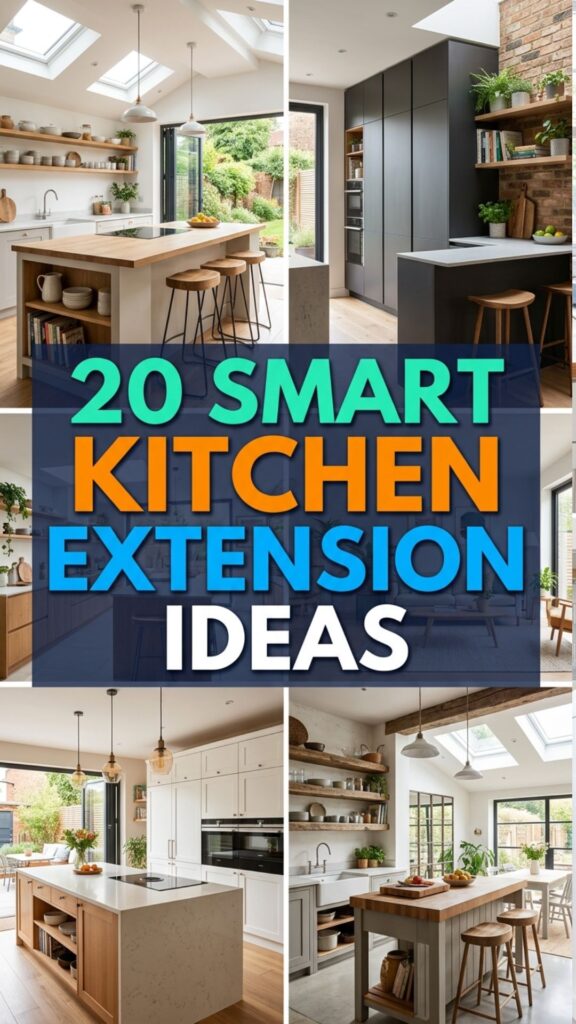
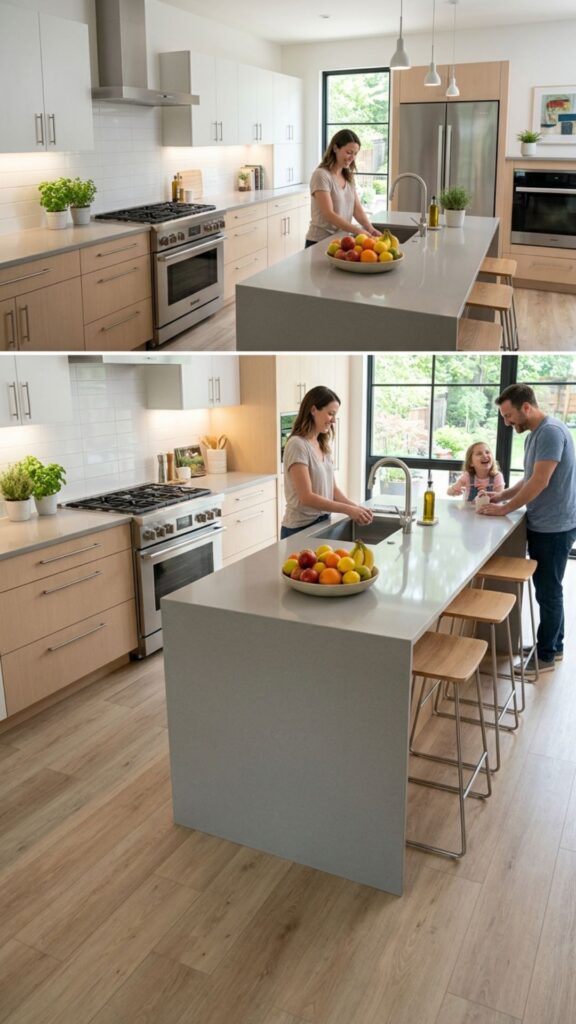
7. Choose a Central Island for Multitasking
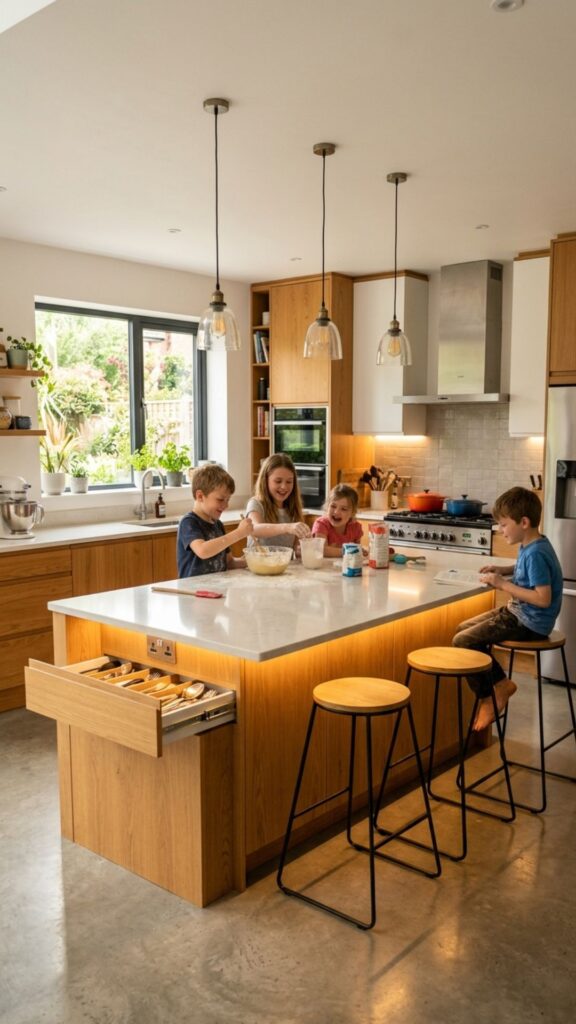
A kitchen island is arguably the single most family-friendly feature you can include in an extension. It provides extra prep space, storage underneath, and seating on one side — which means children can eat breakfast, do crafts, or chat while you cook, all in the same spot.
For family use, aim for an island at least 1 meter wide and 2 meters long. Add a waterfall countertop edge for a sleek finish, and install plug sockets discreetly into the surface for charging devices. Keep the seating side overhang at around 300mm so standard bar stools fit comfortably.
8. Include a Separate Utility Room or Laundry Zone
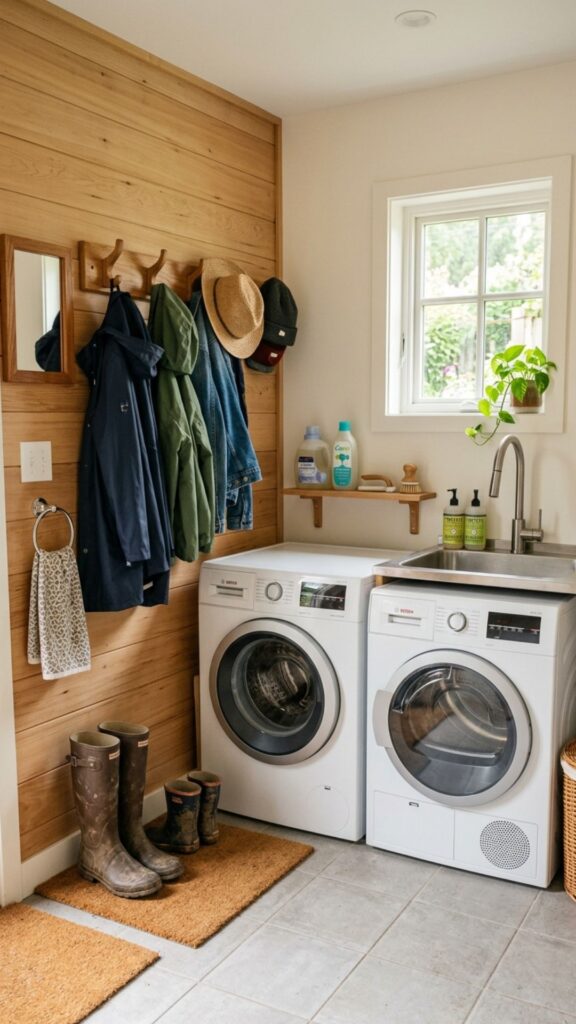
Moving your washing machine and tumble dryer out of the kitchen and into an adjoining utility room is one of the most underrated upgrades for busy families. It frees up kitchen cabinet space, reduces noise during mealtimes, and gives you somewhere to deal with muddy school clothes without cluttering the main cooking area.
Even a compact utility area — 2 square meters is often enough — makes a meaningful difference. Add a sink, hooks for coats and bags, and a boot rack near the door, and you’ve effectively created a practical family mudroom that keeps mess contained.
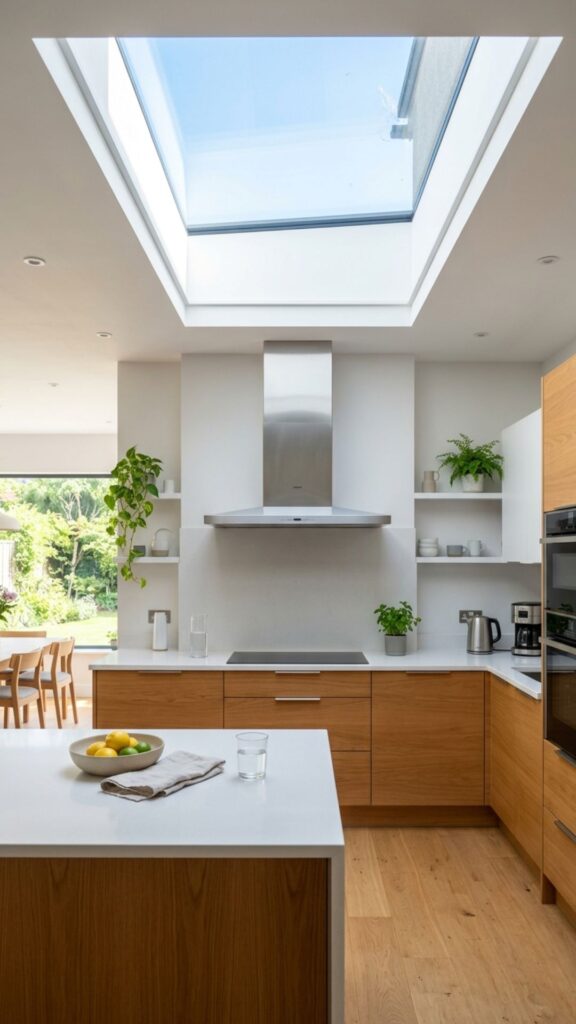
9. Prioritise Natural Light With Skylights or Rooflights
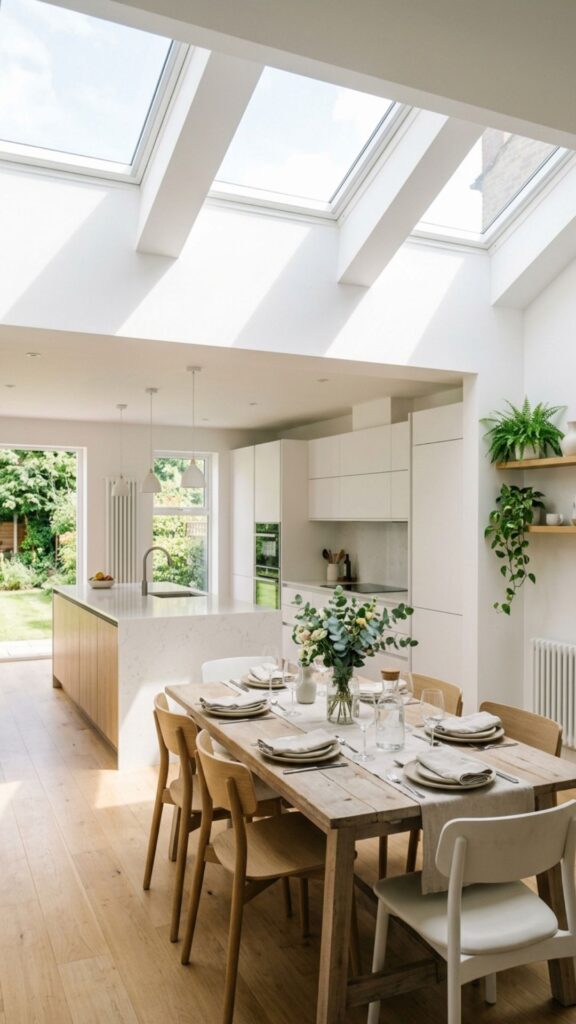
If your kitchen extension sits below a single-storey roof, skylights or rooflights are one of the best investments you can make. They bring in natural daylight from above, which is particularly valuable in spaces that don’t benefit from south-facing windows.
Fixed flat rooflights are the most cost-effective option, while opening rooflights provide ventilation too — useful for clearing steam and cooking smells. Position them above the kitchen work surface or dining table for maximum impact. A naturally bright kitchen genuinely feels more welcoming and helps reduce reliance on artificial lighting during the day.
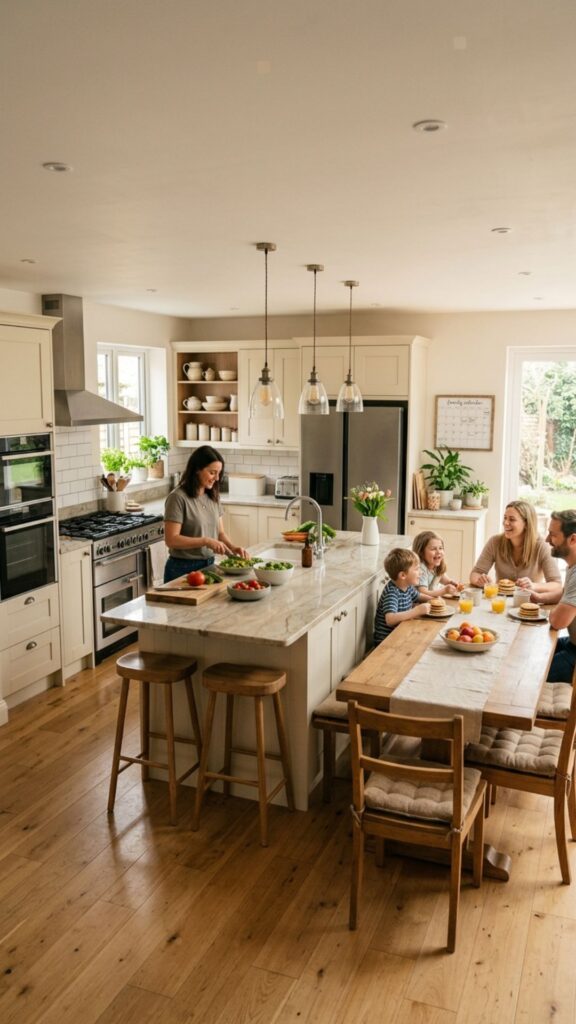
10. Create a Family Dining Space Within the Extension
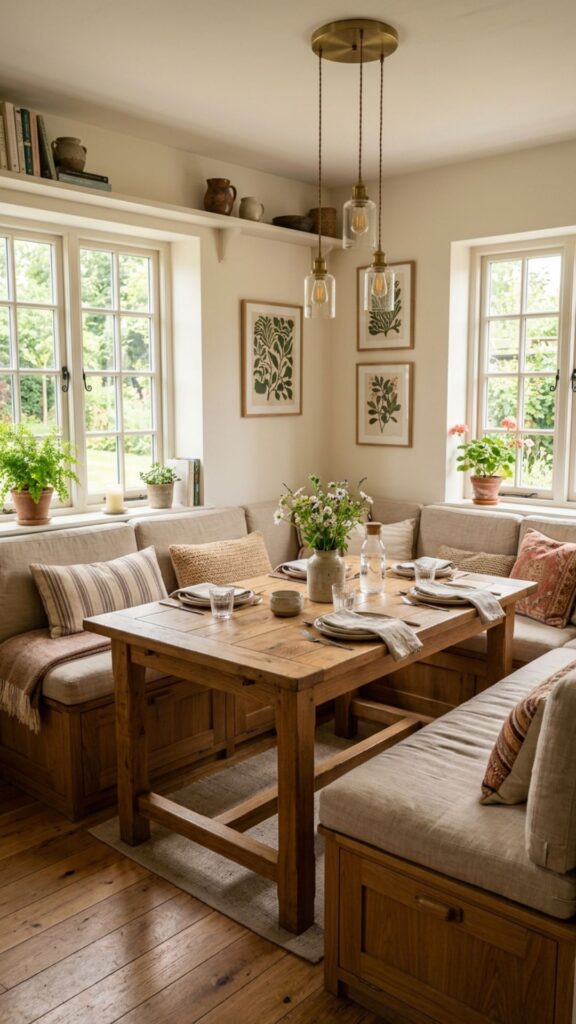
Rather than squeezing a dining table into a corner, design your extension around a proper family dining zone. A large rectangular table that seats six to eight gives everyone room to spread out — for meals, homework, crafts, and everything in between.
Consider a fixed banquette seat along one wall with a bench on the opposite side. This setup maximises seating in a compact footprint, and the banquette can include storage underneath the seat — perfect for hiding toys, board games, or seasonal items you don’t need daily.
11. Use Durable, Easy-Clean Surfaces Throughout
With children in the house, surfaces take a beating. Choosing materials that are tough, easy to wipe, and resistant to stains is a practical priority rather than an aesthetic one. Quartz worktops, for example, are non-porous and highly resistant to scratches and spills compared to natural marble.
For flooring, large-format porcelain tiles or luxury vinyl planks are both family-friendly choices — durable, waterproof, and easy to mop. Avoid materials with deep grout lines or unsealed natural stone where food and bacteria can collect. The right surfaces save you time every single day.
12. Zone Your Extension With Different Ceiling Heights
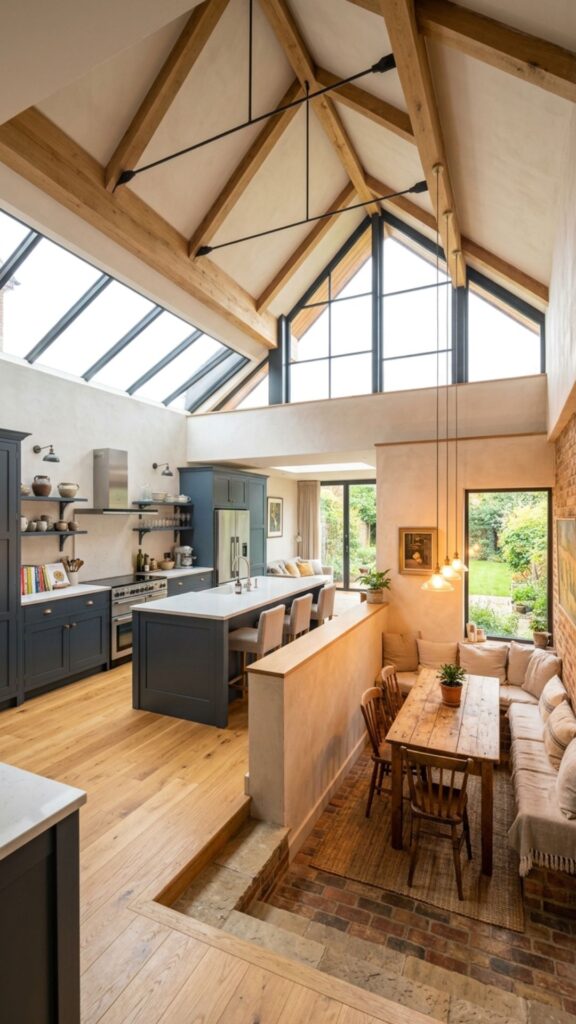
Using varied ceiling heights is an effective architectural trick for defining different zones within one open space. A vaulted or raised ceiling over the kitchen gives it a sense of grandeur, while a lower ceiling over a dining nook creates a cosier, more intimate atmosphere.
This zoning doesn’t require walls, which keeps the space open and connected. It also gives your architect or designer a clear brief: different heights signal different purposes. From a practical view, higher ceilings also allow for more dramatic pendant lighting — which adds warmth and character to the dining area.
13. Plan Generous Plug Sockets and USB Points
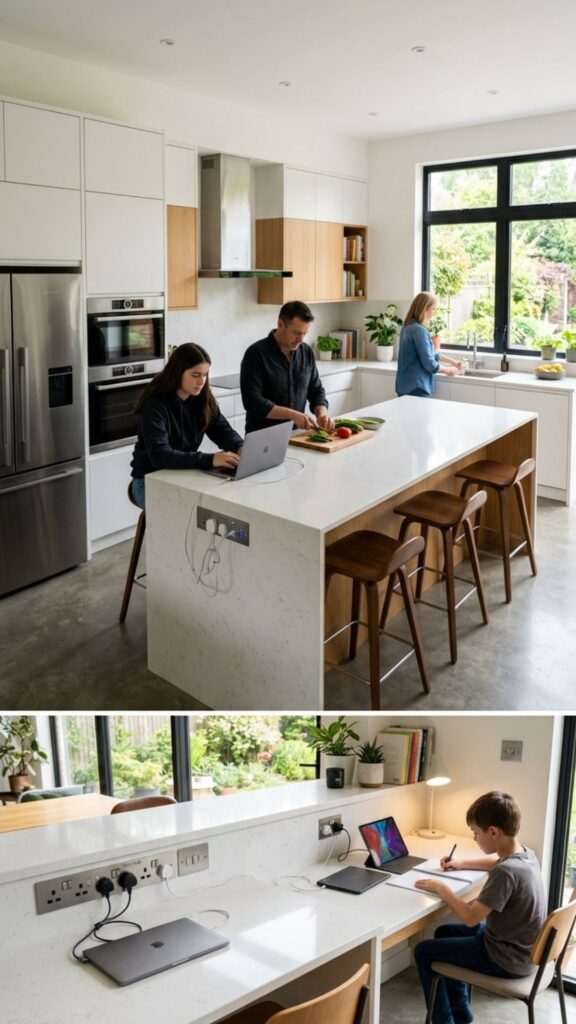
It sounds mundane, but families constantly fight over plug sockets. When designing your kitchen extension, plan for far more electrical points than you think you’ll need. The kitchen work surface alone should have outlets every 600mm to 900mm for appliances, devices, and chargers.
Add USB-A and USB-C ports directly into island surfaces and near the homework desk. Include sockets at lower heights near the dining area for device charging at the table. Getting this right during the build is simple and inexpensive. Trying to add sockets afterwards involves chasing walls and significant disruption.
14. Invest in Good Ventilation and Air Quality
Cooking smells, steam, and heat all accumulate quickly in a kitchen — especially in an enclosed extension with glazing that traps warmth. A high-quality extractor fan or integrated ceiling cassette ventilation system is essential, not optional.
For extensions with rooflights, choose openable versions to supplement mechanical ventilation. If your family cooks frequently or uses the space as a living area, consider an air purifier or heat recovery ventilation (HRV) system that filters air without losing heat. Good air quality makes the space more comfortable for children, particularly those with allergies or asthma.
15. Think About Acoustic Comfort in Open-Plan Spaces
Open-plan extensions are brilliant for family connection, but they can get noisy. Hard surfaces — tiles, glass, concrete, and stone — reflect sound, which makes a busy kitchen feel chaotic when multiple children are present.
Introduce soft furnishings to absorb sound: an area rug under the dining table, upholstered banquette seating, soft roller blinds, and even acoustic ceiling panels that mimic plaster. These additions significantly reduce echo and make the space feel calmer without closing it off. It’s a detail many families wish they’d addressed earlier.
16. Consider Underfloor Heating for Year-Round Comfort
Underfloor heating is a popular upgrade in kitchen extensions, and it works particularly well under porcelain tiles or stone flooring. It provides gentle, even warmth that radiates from below — far more comfortable than a radiator blasting from one wall, and it frees up wall space for cabinetry.
Wet underfloor heating is more efficient in the long run but requires installation within the floor slab — so it must be planned from the start. Electric underfloor heating is easier to retrofit and more affordable upfront but costs slightly more to run. Either option is a genuine quality-of-life improvement for a family space used year-round.
17. Add Smart Home Features That Fit Family Life
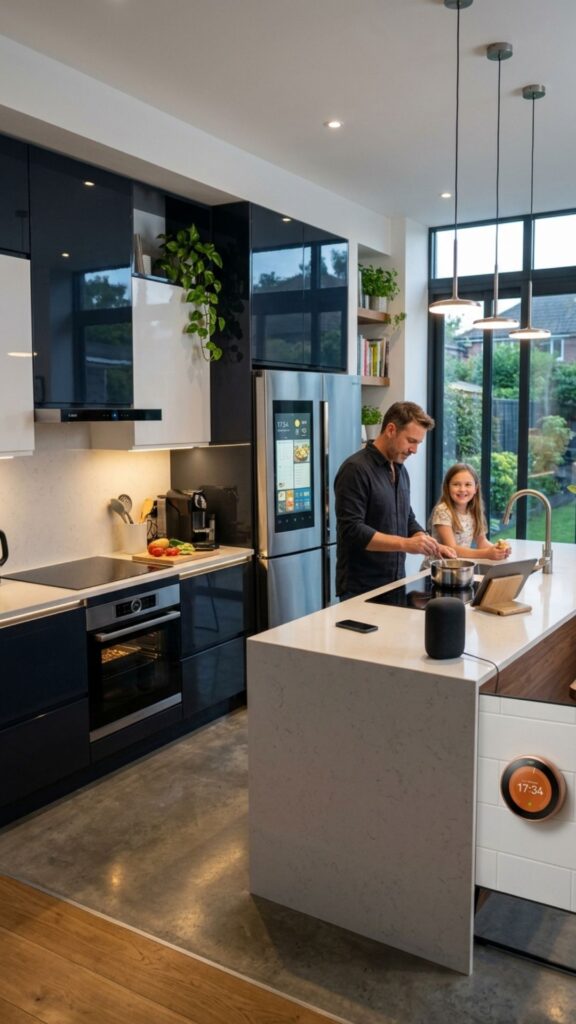
Smart technology in a kitchen extension doesn’t need to be complicated to be useful. Voice-controlled lighting lets you adjust brightness without touching a switch when your hands are full. App-connected ovens can be preheated on the way home from school pickup. Smart plugs let you check whether an appliance was left on after leaving the house.
Keep the technology practical and age-appropriate. Smart locks on the garden door, motion-activated under-cabinet lighting, and programmable thermostats are all sensible family additions. Avoid overcomplicating systems that children (or grandparents) won’t intuitively understand.
18. Budget Realistically and Build in a Contingency
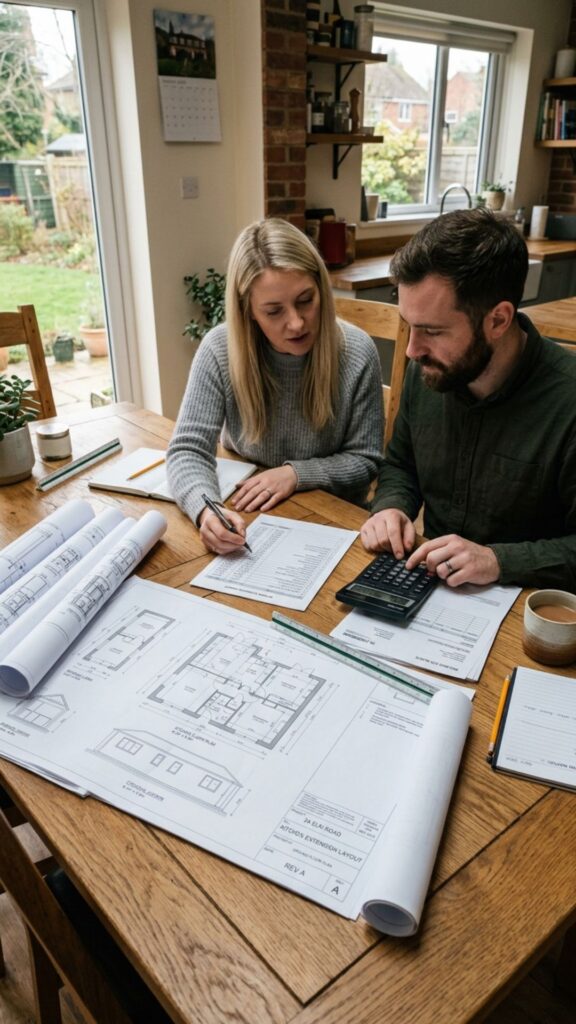
Kitchen extension costs vary widely depending on size, specification, and location. As a general guide in the UK, a single-storey rear extension typically costs between £1,800 and £3,000 per square metre once fitted out. A 20-square-metre extension with a new kitchen could therefore cost anywhere between £40,000 and £70,000 or more.
Always build in a contingency of at least 10-15% on top of your agreed budget. Unexpected discoveries during groundwork — drainage, structural issues, or old services — are common and can add cost quickly. Getting three detailed quotes from reputable builders and checking their references is essential before committing.
19. Understand Planning Permission Before You Start
Many single-storey rear extensions fall under Permitted Development rights in the UK, meaning you don’t need full planning permission — but there are strict rules about size, height, and materials. Side-return extensions and two-storey extensions almost always require planning permission.
Before any work begins, consult your local planning authority or speak to an architect who can confirm whether your project qualifies as Permitted Development. Applying for a Lawful Development Certificate gives you written confirmation that no permission is needed — which protects you when you come to sell the property later.
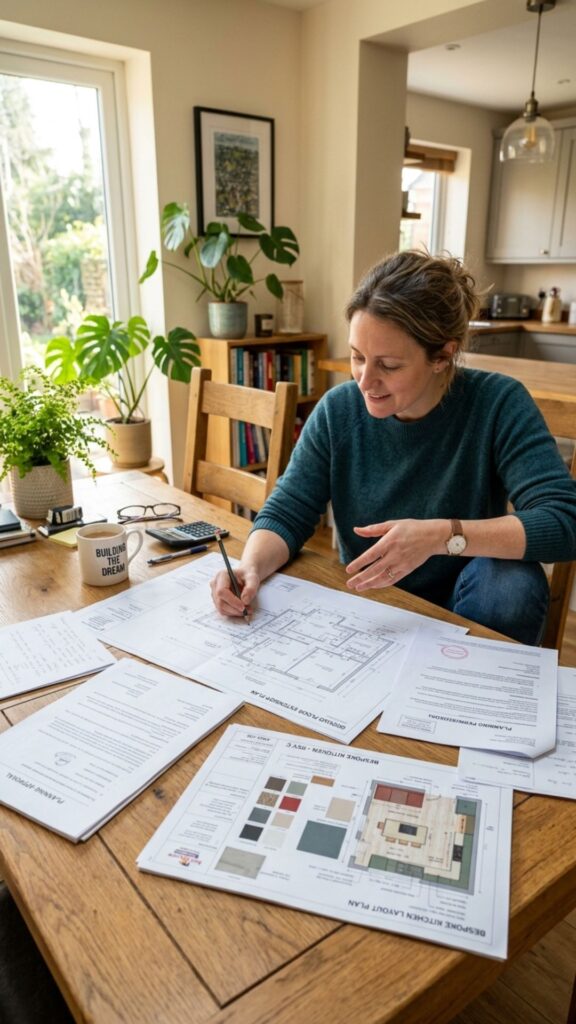
20. Work With a Specialist Architect or Design and Build Firm
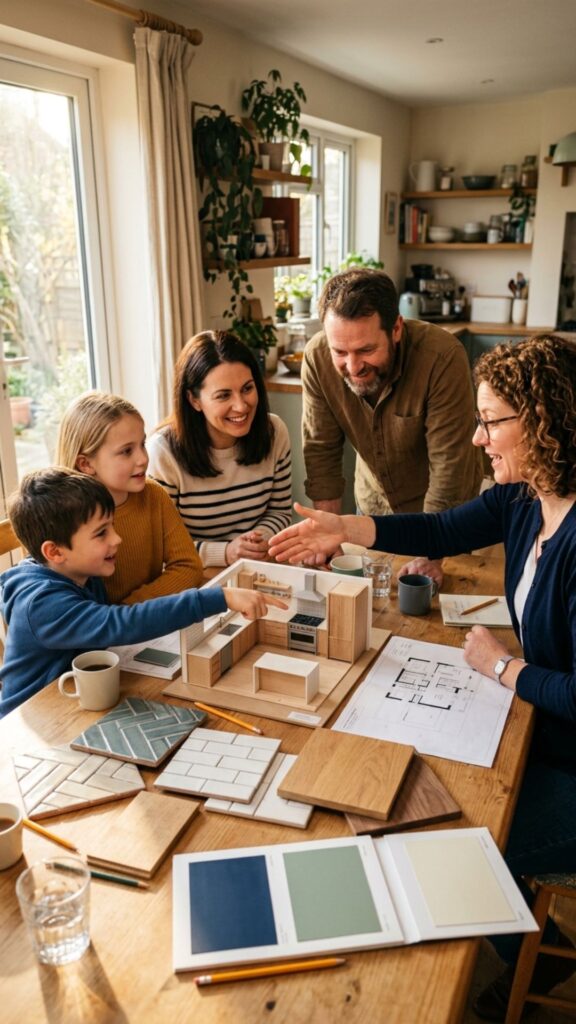
The most successful kitchen extensions are those that are planned thoroughly before a single brick is laid. An architect who specialises in residential extensions can help you make the most of your space, navigate planning rules, and design a kitchen that genuinely works for your family’s lifestyle.
Design and build companies offer an alternative — handling both design and construction under one roof, which simplifies communication and accountability. Whichever route you choose, ask for examples of previous family-focused projects, check online reviews, and get everything in writing. A well-managed project delivers far better results than the cheapest quote.
Conclusion
A thoughtfully designed kitchen extension is one of the best investments a growing family can make. It creates space for cooking, eating, studying, and simply being together — which is exactly what a family home should offer.
Use these 20 ideas as a starting point for your planning conversations. Mix and match what suits your family’s needs, your budget, and your home’s layout. The best kitchen extension isn’t the biggest or the most expensive — it’s the one that fits the way your family actually lives.
Ready to take the next step? Start by speaking to a local architect or design and build specialist and get a realistic picture of what’s possible for your home and budget.
Do I need planning permission for a kitchen extension?
Not always. Many single-storey rear kitchen extensions in the UK fall under Permitted Development rights and don’t require full planning permission, provided they meet specific size and height limits. However, side extensions, two-storey extensions, and properties in conservation areas typically do need permission. Always check with your local planning authority before starting work.
How much does a kitchen extension cost?
Costs vary significantly depending on size, location, and finish level. In the UK, a single-storey kitchen extension typically costs between £1,800 and £3,000 per square metre, including construction and a fitted kitchen. A 20-square-metre extension with a mid-range specification might cost between £40,000 and £65,000 in total. Always budget an additional 10-15% contingency for unexpected costs.
How long does a kitchen extension take to build?
Most single-storey kitchen extensions take between 10 and 16 weeks to complete once construction begins, though the planning and design stage can add several months before groundwork starts. Larger or more complex projects take longer. Build in extra time if you’re applying for planning permission, as decisions can take eight weeks or more.
What is the best kitchen extension layout for a family?
An open-plan layout combining the kitchen, dining area, and a relaxed seating zone works well for most families. It keeps everyone connected while allowing different activities to happen simultaneously. Adding a central island for seating and prep, a defined dining table area, and a small homework nook makes the space highly functional for day-to-day family life. Good storage, durable surfaces, and strong natural light all contribute to a layout that holds up well over time.